Intro
Bandits wargame is one of the most basic game and is aimed toward beginners. There are a total of 33 levels and the levels get harder and the underlying vulnerable technology changes. The levels start with a focus on basics of linux and end with some challenges related to git. At the end of each level, we will find either the password to next level, or we will get the ssh key. In this blog I will demonstrate my journey through the game and explain the command wherever required. So let’s start with it!
Note - If you want in depth explaination of some particular command, you can google or dig into the man pages as recommended on the OverTheWire website.
Level 0
Level 0 is as simple as it can get. We are just required to ssh into the server and read the password file 
Level 1
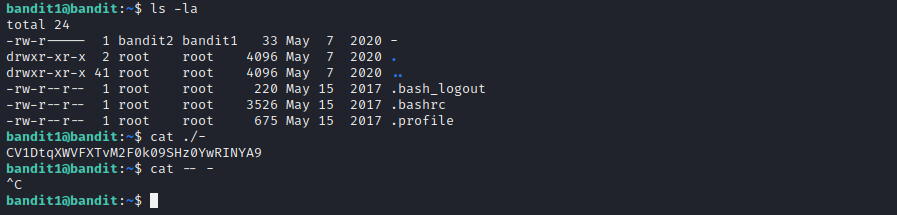
In level 1 we are supposed to read a file with a “-“(dash) as it’s name.
Level 2
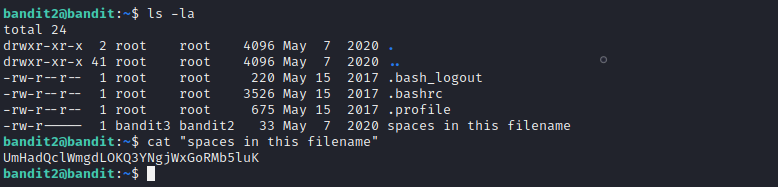
Level 2 has us read a file with multiple spaces in the file name.
Level 3
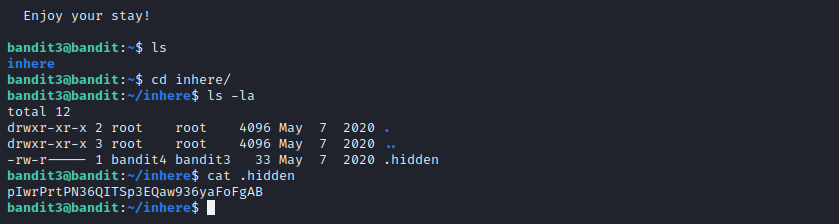
Here we are supposed to read a hidden file.
Level 4
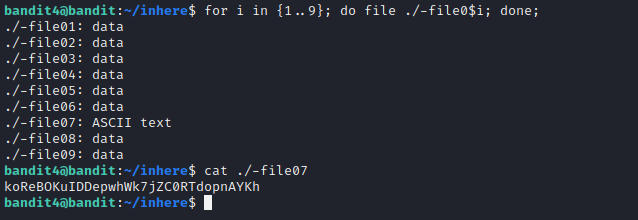
In this level we are supposed to find a human readable file from a number of files. I used a simple for loop to iterate through all the files present. We can use grep command to get better output.
Level 5
To reach level 6 we need to find a file which is:
- Human-readable
- 1033 bytes in size
- Not executable
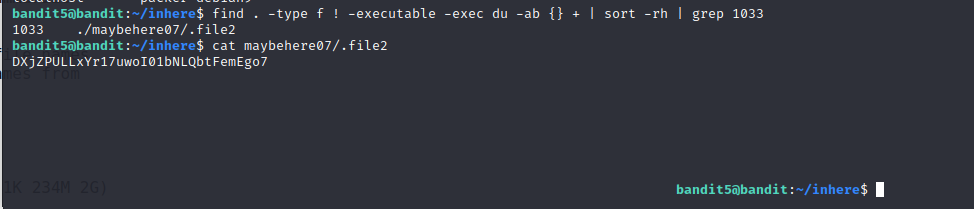
The solution to this levels looks kind of a handful. Let’s break it down further. We will begin with the find command
1
find . -type f ! -executable -exec du -ab {} +
- “-type f will look for regular files only.
- ”! -executable” will omit the files with the executable privileges.
- “-exec” will execute the command which follows it whenever there is a match.
1
du -ab {} +
The du command is used within the find command and is run whenever the find command finds a match. Here:
- -a makes sure that the size for all the files are calculated.
- -h prints the data in the form of bytes.
1
sort -rh | grep 1033
Here the sort command will first reverse(-r) the sorted results and grep will output the line containing the text 1033.
And with this we got the desired output.
Level 6
Level 6 has us looking for another file with the following properties:
- Owned by user Bandit7
- Owned by group Bandit6
- 33 Bytes in size

Here we used the find command similar to previous level but this time we differentiated on the basis of group(-group) and owner(-user). The du command operates similarly as well.
Level 7
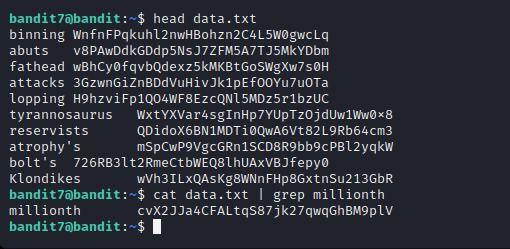
Here we are supposed to find the word millionth and right next to it, we will find the password.
Level 8
In this one we are supposed to find the unique line of text in the given file.

Here we used the uniq command with -u parameter printing only the unique files. And used the sort command as a method to feed the data.
Level 9
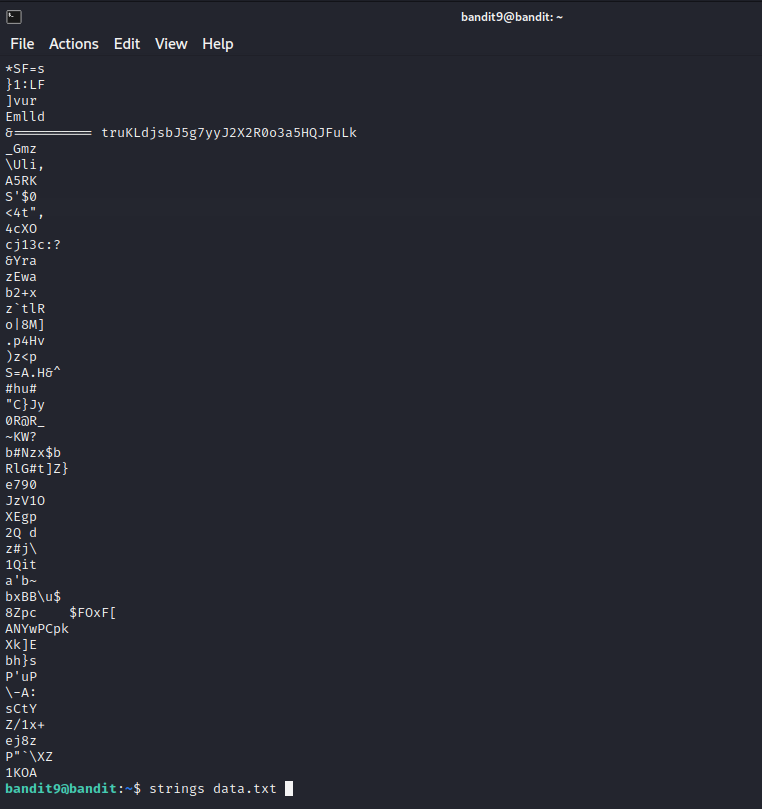
Next up we had to find the humand readlable string followed by “=” characters. We can used the “strings” command for the same.
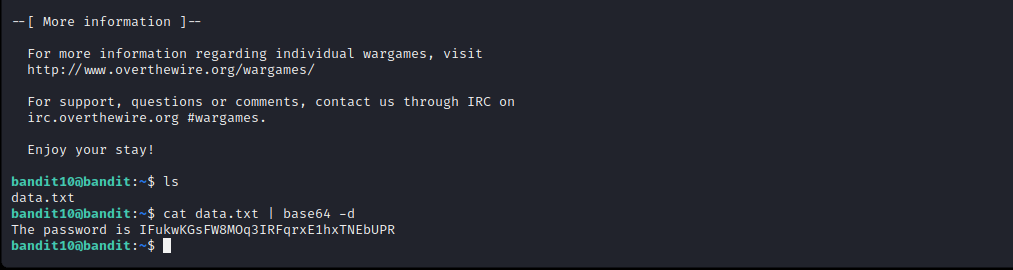
Level 10
Here we are supposed to decode the data. We used the inbuilt base64 library to decode.
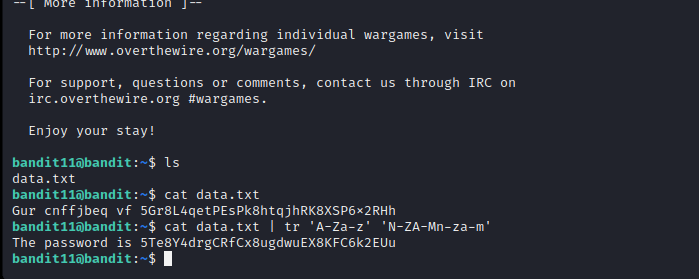
Level 11
In this level, the data has been rot13 encoded and we are supposed to decode it. We could’ve used a utility like cyberchef, but the website recommended using tr command.
Level 12
Next up, we are provided with a hexdump file which has been repeatedly compressed.
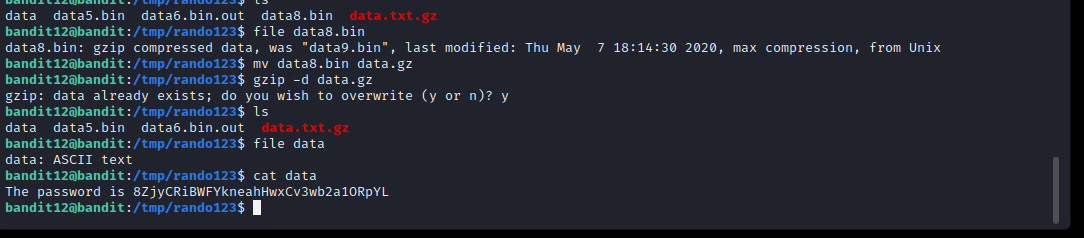
Here we repeatedly used the following commands to decompress the respective archives.
1
bzip -x data
1
gzip -d data
1
tar -xf data
Level 13
In this one, we were provided with a ssh key file which was conveniently placed in our user’s home directory.
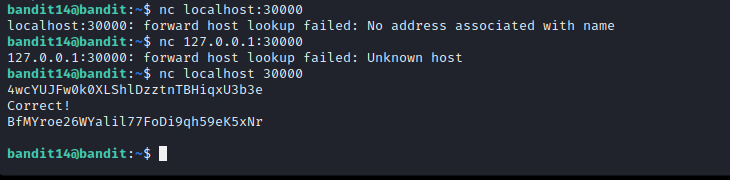
Level 14
Level 14 introduces us to the netcat utility command. We are required to submit the password of the current user(Bandit14) to port 30000. In the previous level we were provided with a ssh key. To get the password we have to dig into /etc/bandit_pass directory. Once we got the password, we can use the nc command as shown below to complete the level.
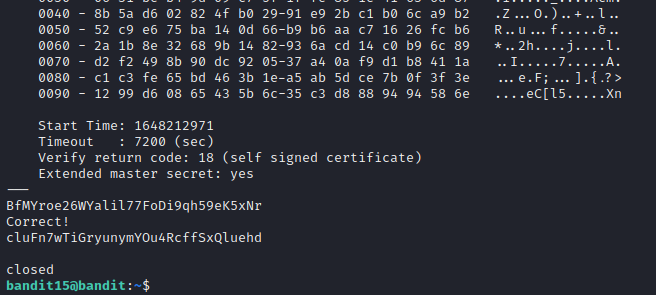
Level 15
Here, the concept is pretty similar to the previous level but this time the connection should be SSL encrypted. For that we used openssl s_client command.
1
openssl s_client -connect localhost:30001
After the above command, You just have to enter the password to current level and get the pass to next one.
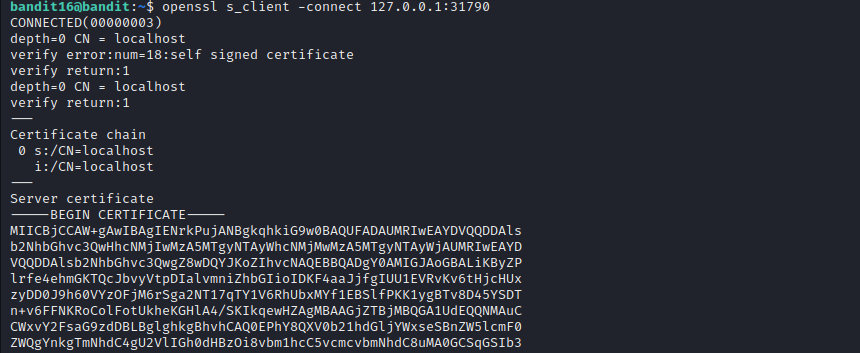
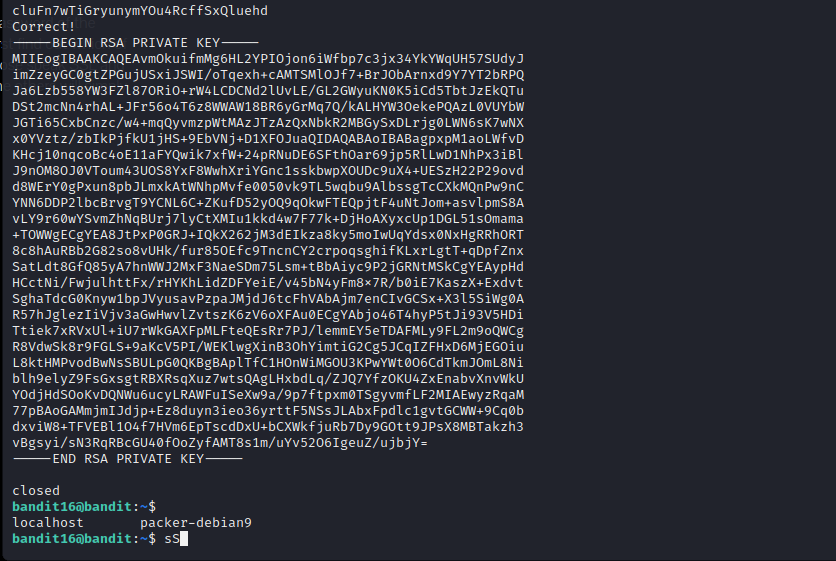
Level 16
Level 16 introduces us to another network utility called nmap. We are supposed to find a port running a specific service and using SSL as well. The port range given is 31000-32000. First we will use nmap and afterwards just like previous level, openssl.
- Note: -sV makes nmap do a service scan, revealing the services running on the open ports.

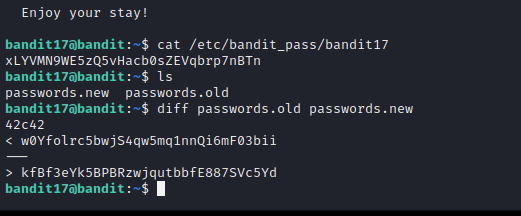
Level 17
Here we are just supposed to find the only line which is different in the two provided files. diff command makes it really simple.
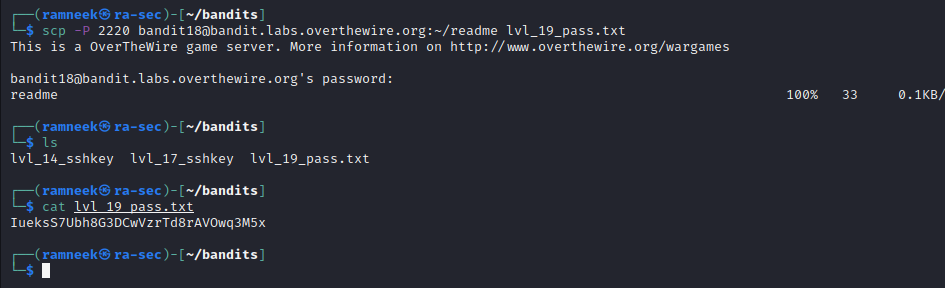
Level 18
In this level, whenever we try to log in using ssh, we are instantly logged out with a message “ByeBye!”. Since we know there is a file called readme in the home directory and we have the ssh password, we can use a utility like scp and transfer the file from the game server to our local system.
Level 19
Level 19 aims to introduce us to the concept of Setuid bits, I recommend reading about them if you are new to it. 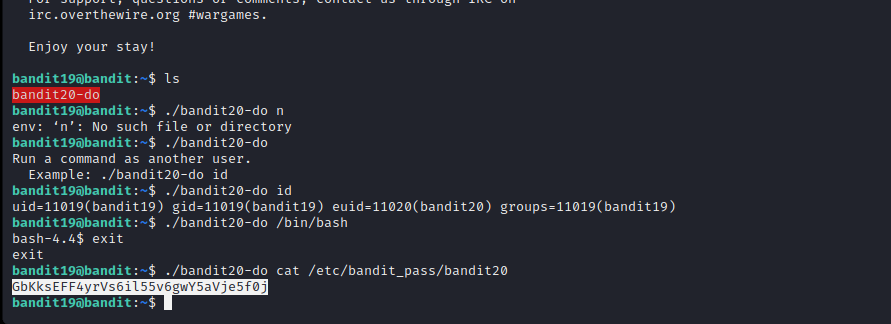
Level 20
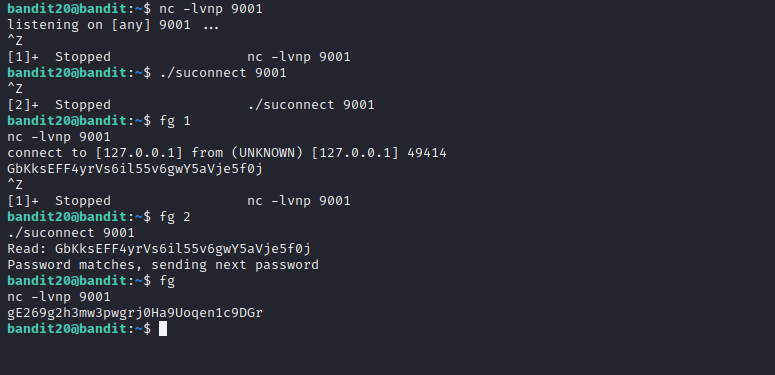
In this level, we are provided with another suid bit binary. It makes a connection to the localhost on a specified port. We are supposed to provide the binary the password of bandit20 and we will get the pass to bandit21.
Now the way binary works is that, we have to first start a listener(using nc) on a desired port and make the binary connect to that port. We need both of them to be running concurrently. For that, we will background one process using CTRL+Z and use fg command to bring the desired process up. Once the binary is connected, Using nc we will supply the current password. Next we will switch to the suconnect binary using fg, where the password will be checked. Once verified we will get the password to bandit21, on our nc listener process.
Level 21
Level 21 introduces us to the cron jobs. These jobs are automatically executed at a certain interval of time. First we’ll check in the cron directory, /etc/cron.d and look for our next bandit’s cron job. It seems to be a simple script, writing the value of the password to a random file in the /tmp directory.

Level 22
This time around we have another cron job but a tad bit more complex shell script. Here the script is first getting the username of the current user and afterwards md5 hash it. And it uses that same hash to create a file under the /tmp directory with password to next user. To find the hash value and hence the file name, we can simply hash the input ourselves on our local system as we already know what the input is.
Images coming soon
Level 23
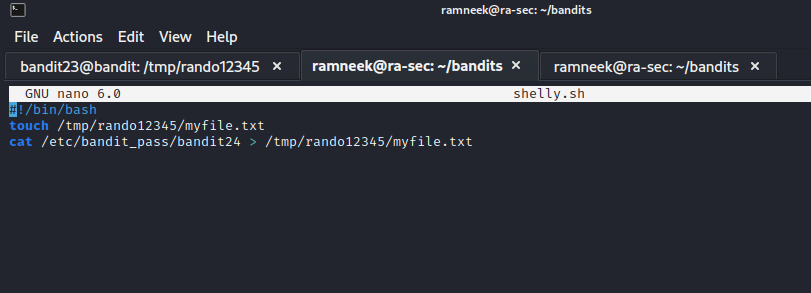
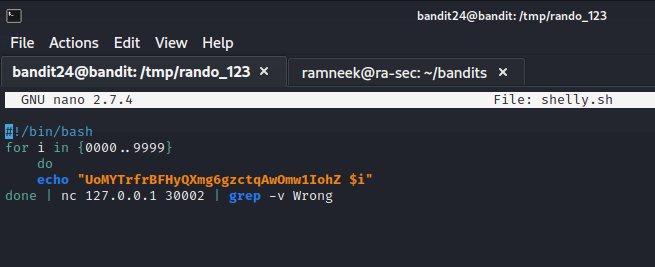
Following the trend, this level also introduces us to another script running after certain intervals. This script executes every script present in the /var/spool/bandit24 directory. For this challenger I wrote a small script to output the password to next level in a file in /tmp directory.
Script:

Output:
Level 24
For this level we have a service listening on port 30002. To obtain the password of bandit 25, we need to supply a 4 digit pin-code. We are supposed to brute force it. So once again I wrote a small script to brute force the service with numbers ranging from 0000-9999.
Script:
Output:

Level 25
This level introduces us to a new kind of shell, and not a regular ol’ bash. We can actually use the previous user to find out what it reads.
Shell:
1
2
3
4
5
6
bandit25@bandit:~$ cat /etc/passwd | grep bandit26
bandit26:x:11026:11026:bandit level 26:/home/bandit26:/usr/bin/showtextbandit25@bandit:~$ cat /usr/bin/showtext
#!/bin/sh
export TERM=linux
more ~/text.txt
exit 0
It seems that our unique shell invokes more command upon execution. For this we are required to resize our terminal so that it just becomes a rectangle with a long width but less height to invoke the effects of more command. Once that is done, we just have to press V key and we can use :shell to get a small editor open.
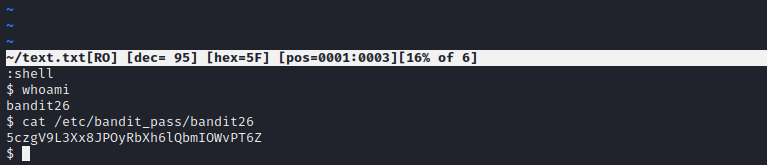
Level 26
In this level we can using the similar method as in the previous level, we can get the shell. And similar to a past level, we have a suid bit binary. We can just use that to get the password to next level. 
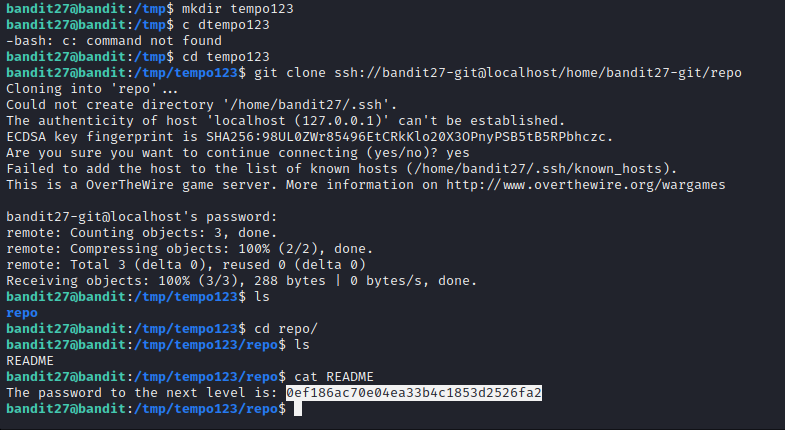
Level 27
For this level we just have to clone a specific repository and find the password to next level from within that repo only.
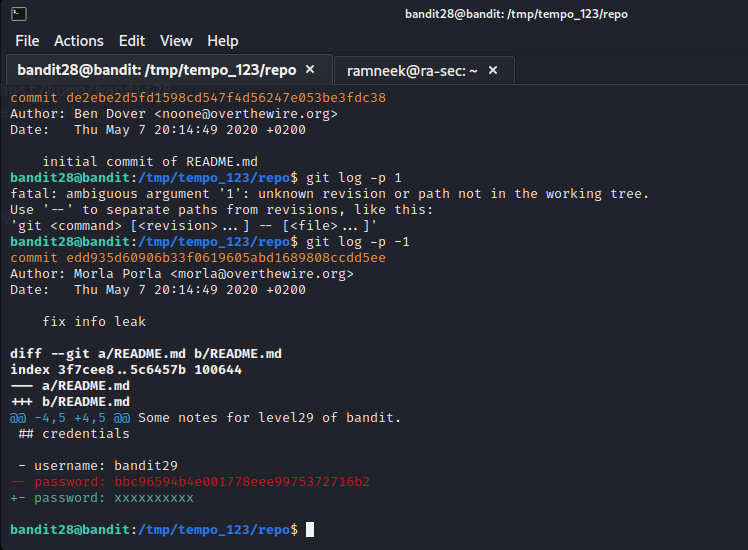
Level 28
This level includes another repository but we have to look into the commit history in order to get the password to next level.
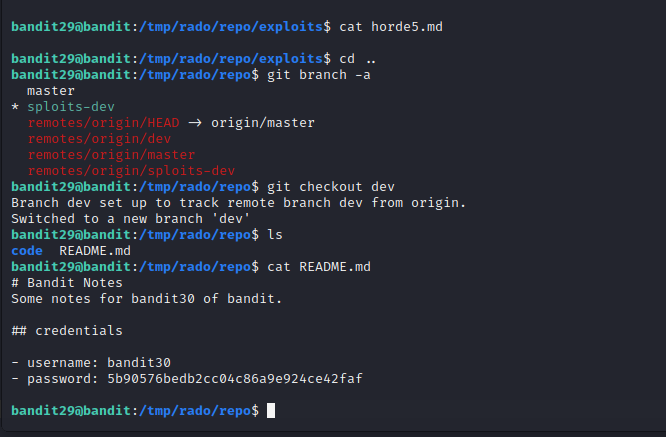
Level 29
Another level and another repository. In this one, the password is contained in a branch other than master.
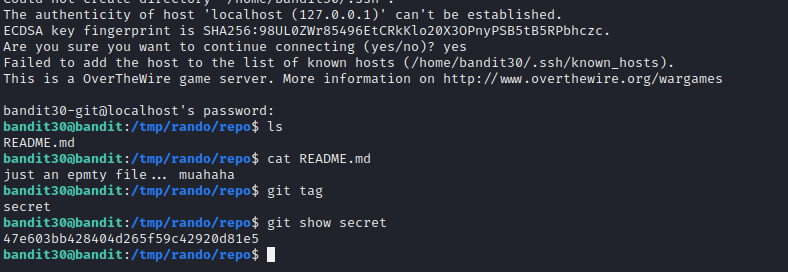
Level 30
With this repository we were supposed to inspect the tags on the cloned repository.
Level 31
This level aimed to introduce us to the concept of committing the code to github repositories. We have to commit the password to current user to the repository.

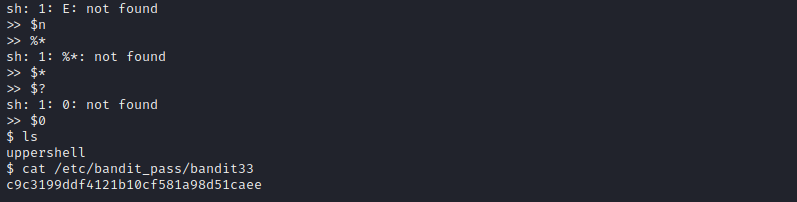
Level 32
As the last level of the game, we have another shell escape. The shell seems to convert every command to uppercase. It seemed to be an interactive shell running as a binary itself, hence when used $0(which returns the current shell name), we were provided with our trusty bash shell.