This lab is going to be the first of many. There is so much to learn and there is so much to experiment with here. It is going to be a great experience. So without further ado let’s start with an overview.
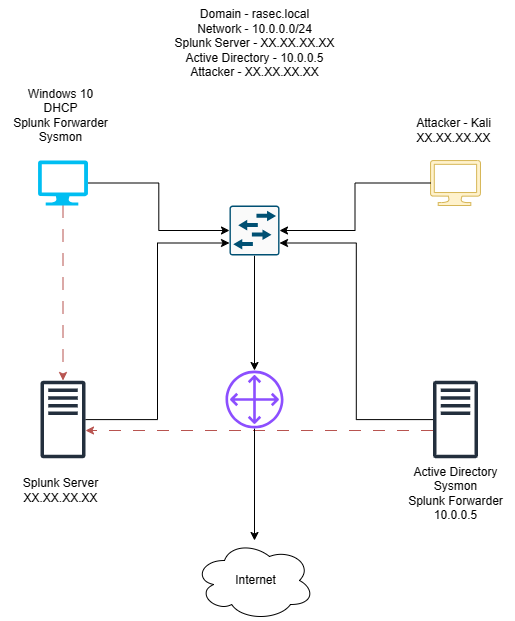
The above diagram gives a brief overview of the whole lab. We have a total of 4 VMs set up. I’ll go through more info regarding each one.
Note - All the VMs are on the same NAT network. It is a default network with VirtualBox and VMware. Make sure that all the VMs are on NAT network to ensure connectivity. If you wish to avoid any contact with internet(not recommended for installation segments) you can proceed with host-only network or custom networks.
There are a few things which are not covered in this blog
Let’s begin with the configuration then!
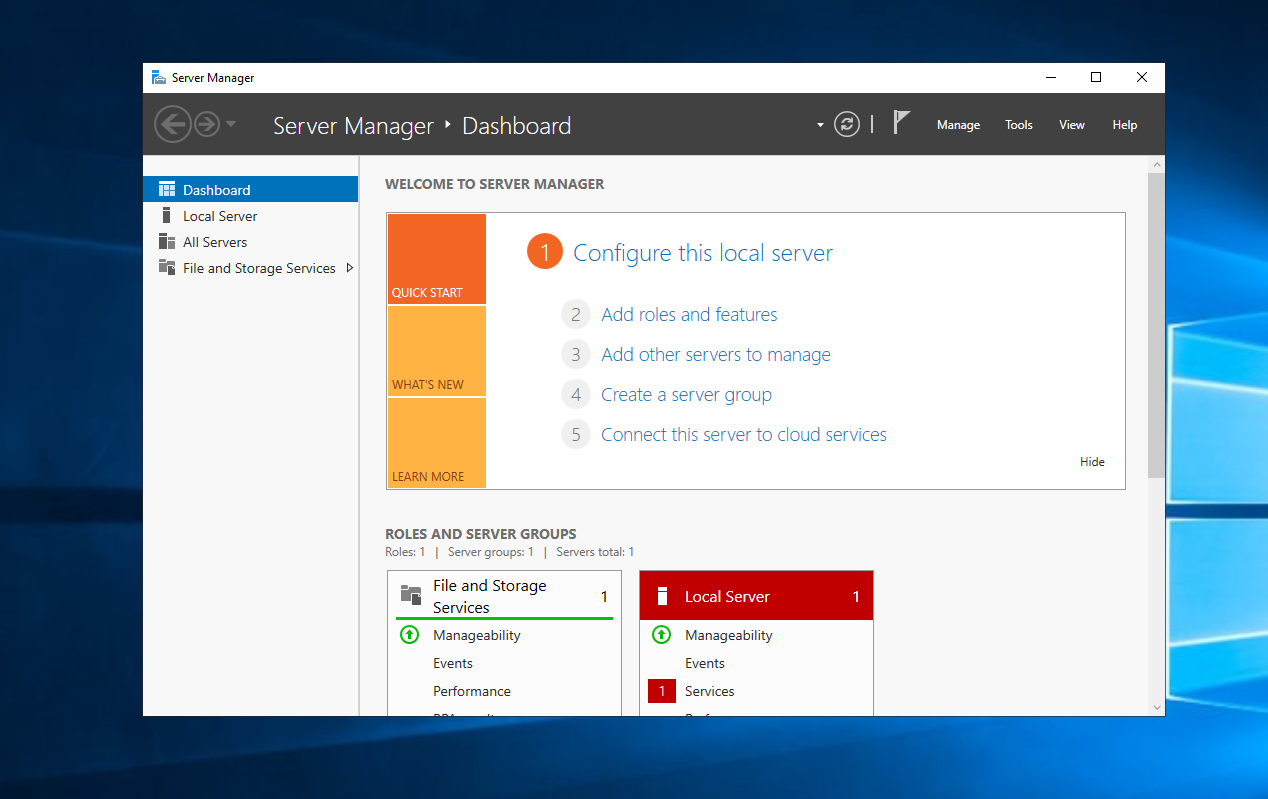
Assuming that Windows Server is successfully installed, we’ll be greeted by the trusty Server Manager.
But before we head on with the server configuration we need to rename the server. (And not make the mistake I made. I configured the server, promoted it to Domain controller and then to rename the server I had to demote the server and redo it :))
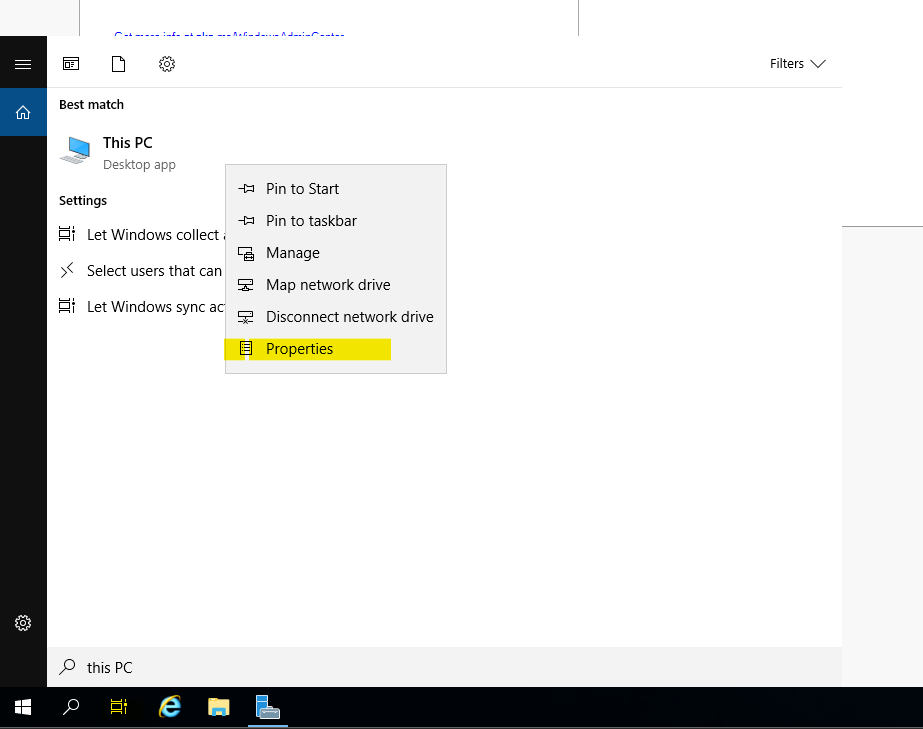
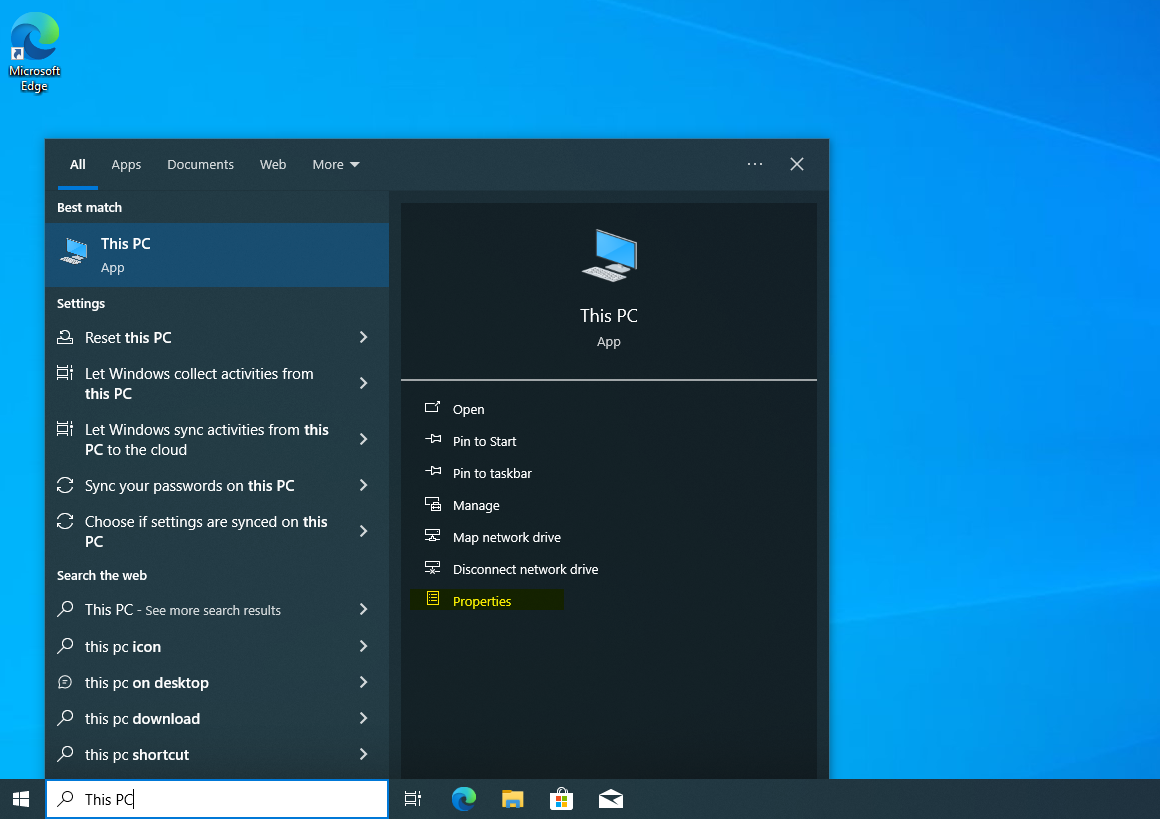
Doing that is fairly simple. Search “This PC” on search bar and open properties.
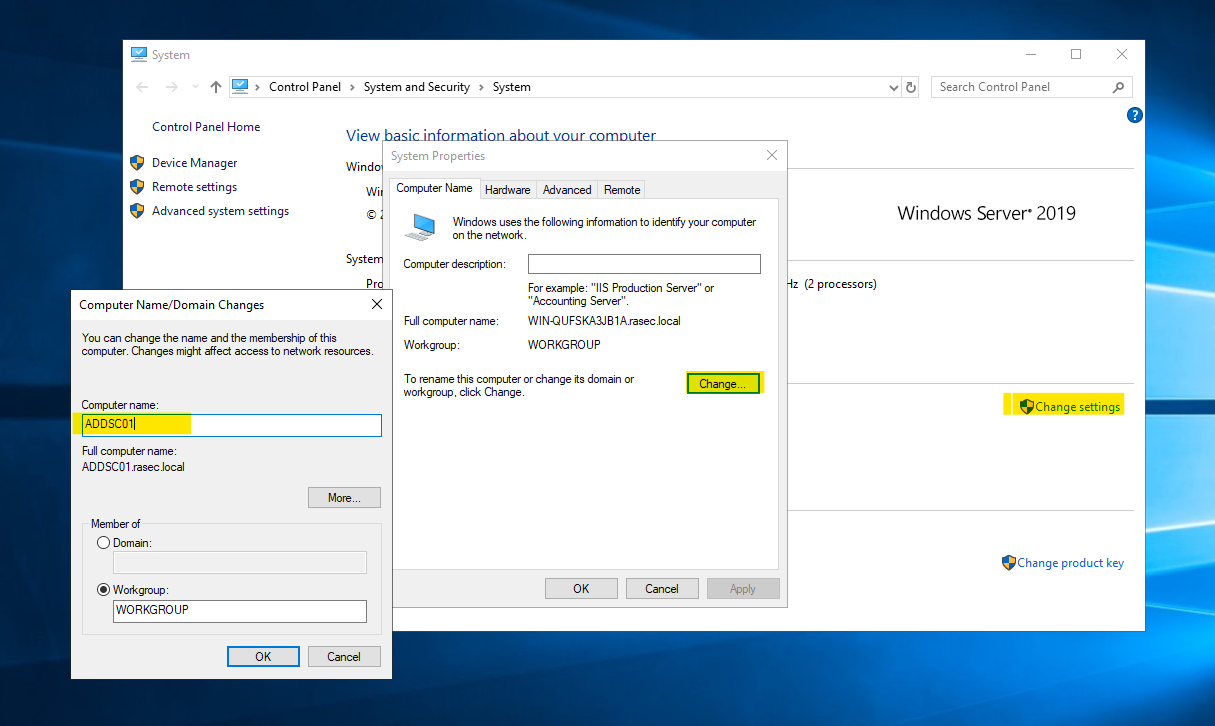
Here we’ll click “Change Settings” and click on rename the server. It’s as easy as it can get.
With the server renamed, let’s get started with getting the Active Directory Domain Services installed. For that, we’ll return to the Server Manager and head over to the “Add Roles and Features” section as shown in the screenshot below.
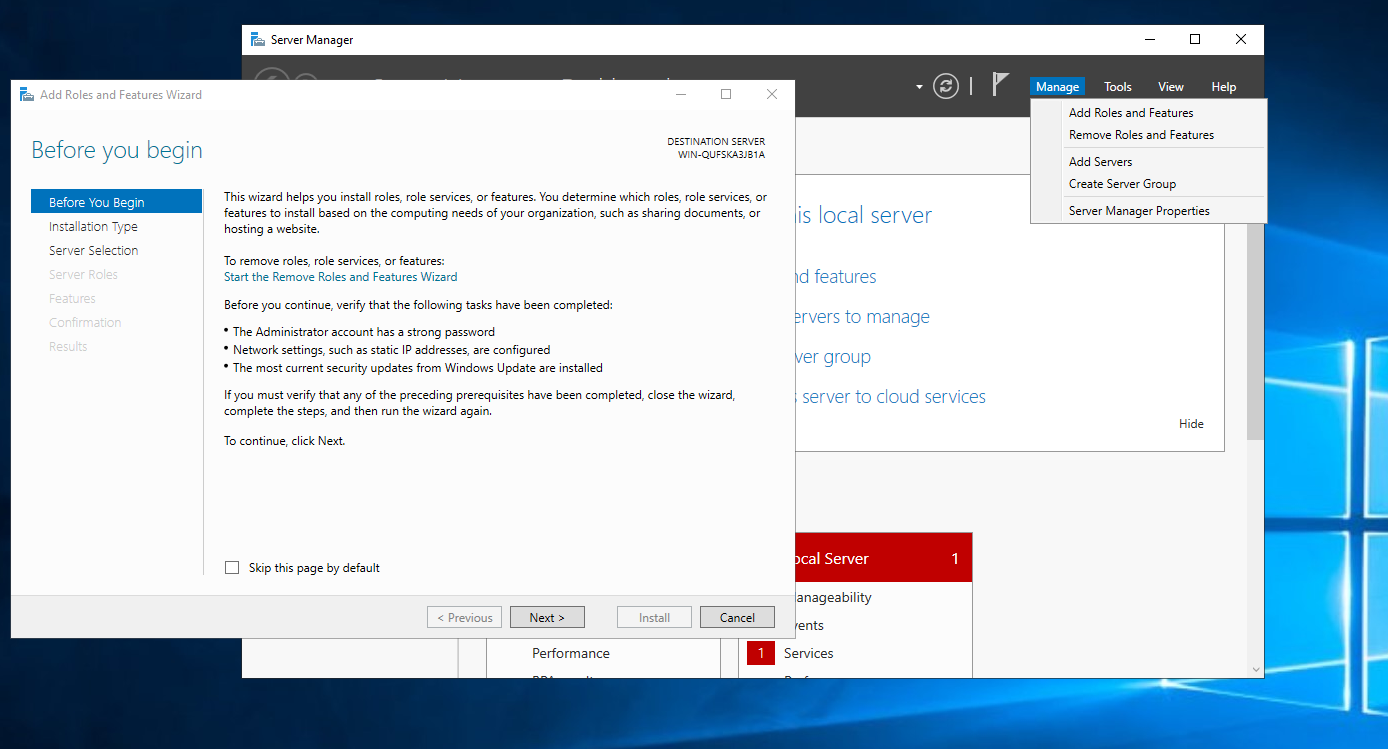
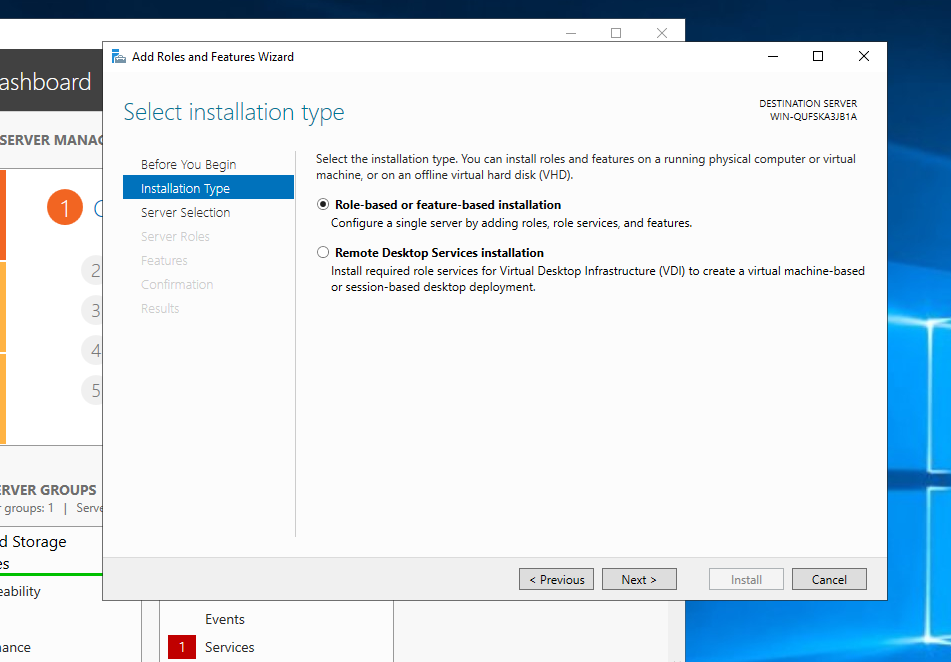
Here we’ll select Role-Based installation.
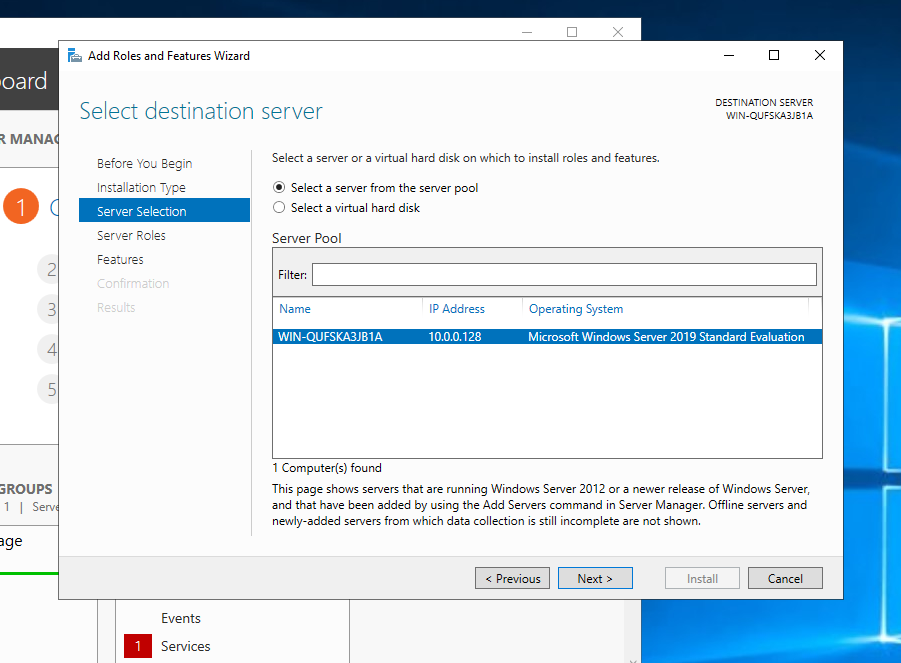
Select the desired server. In my case it’s just one available.
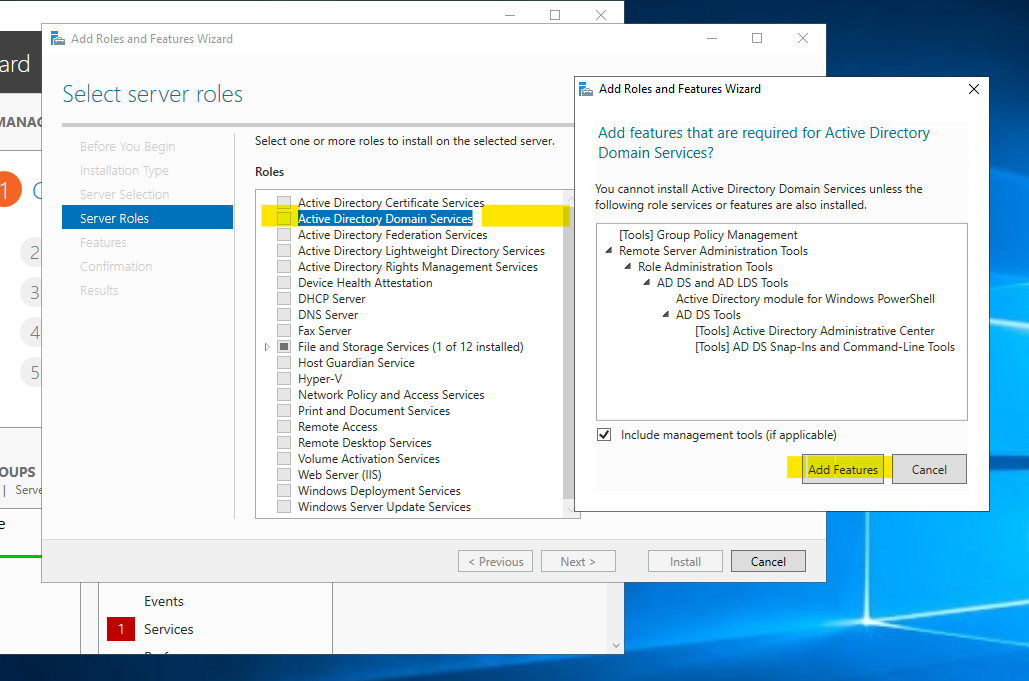
Select the AD DS services, then add features as shown below and defaults should be fine so click next until the installtion page.
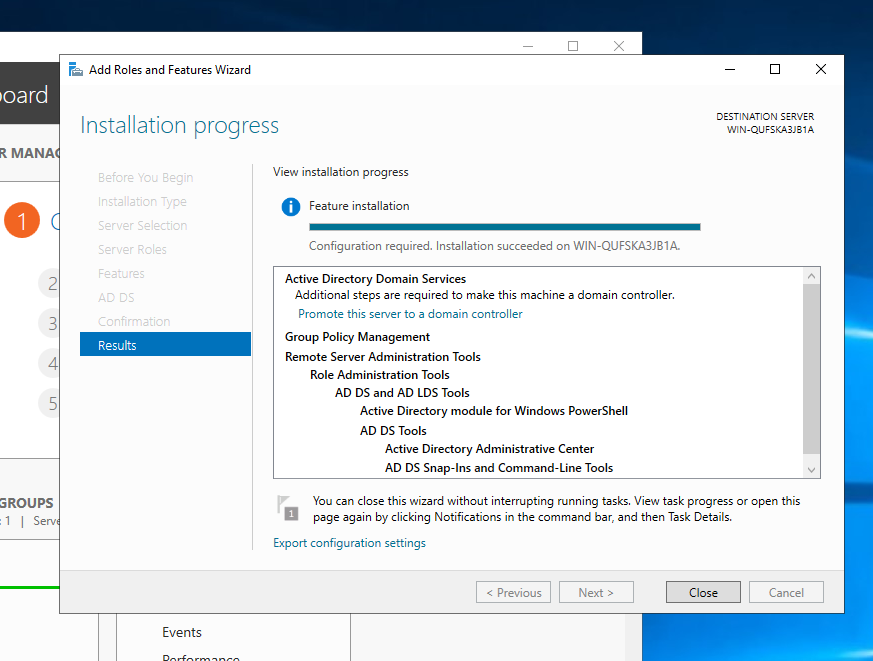
Once the installation is completed, we can close the dialog and proceed with the promotion of the server to the Domain Controller status.
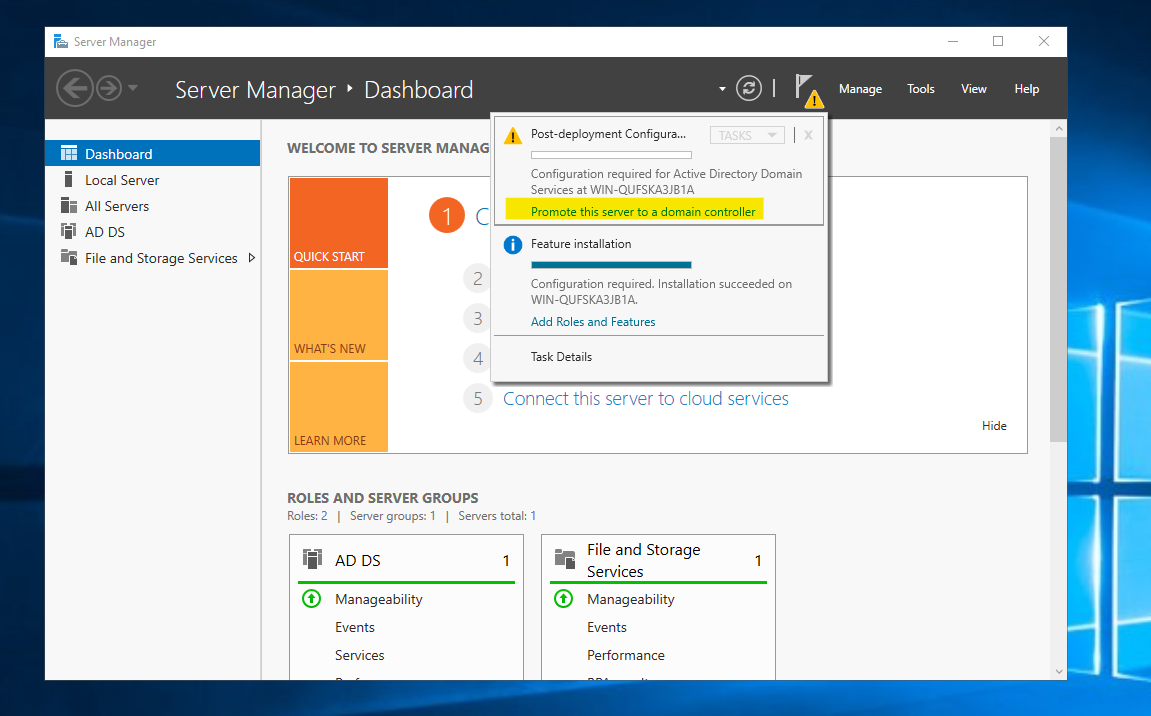
To promote the server click the yellow exclamation mark near the flag and you should be able to see the option to promote the server.
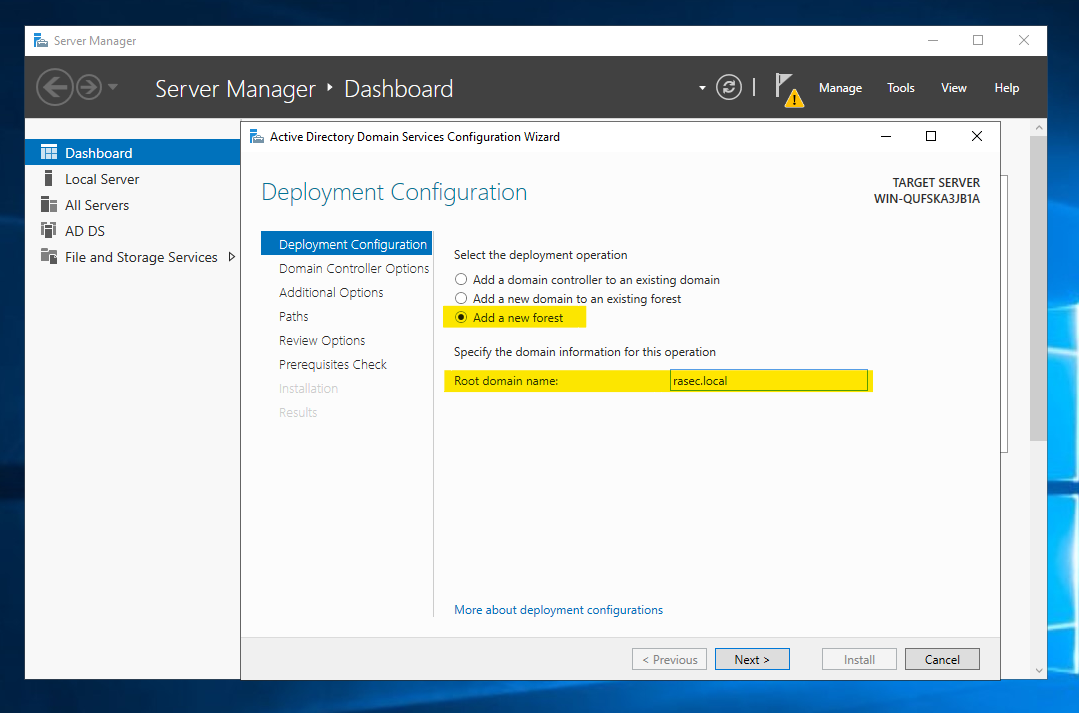
We should be greeted with the Deployment Configuration dialog. Here, we’ll create a new forest.
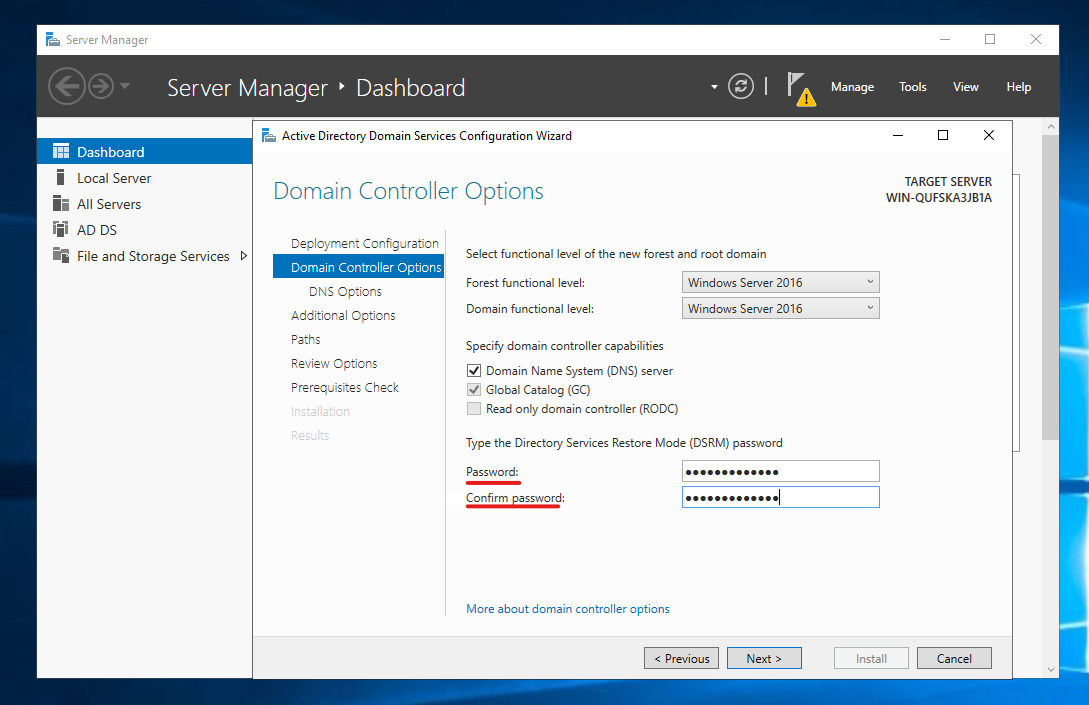
Next, we’ll set up the DSRM (Directory Services Restore Mode) Password.
You shouldn’t need to make any adjustments to the in-between settings so we can directly jump straight to pre-requisite checks.
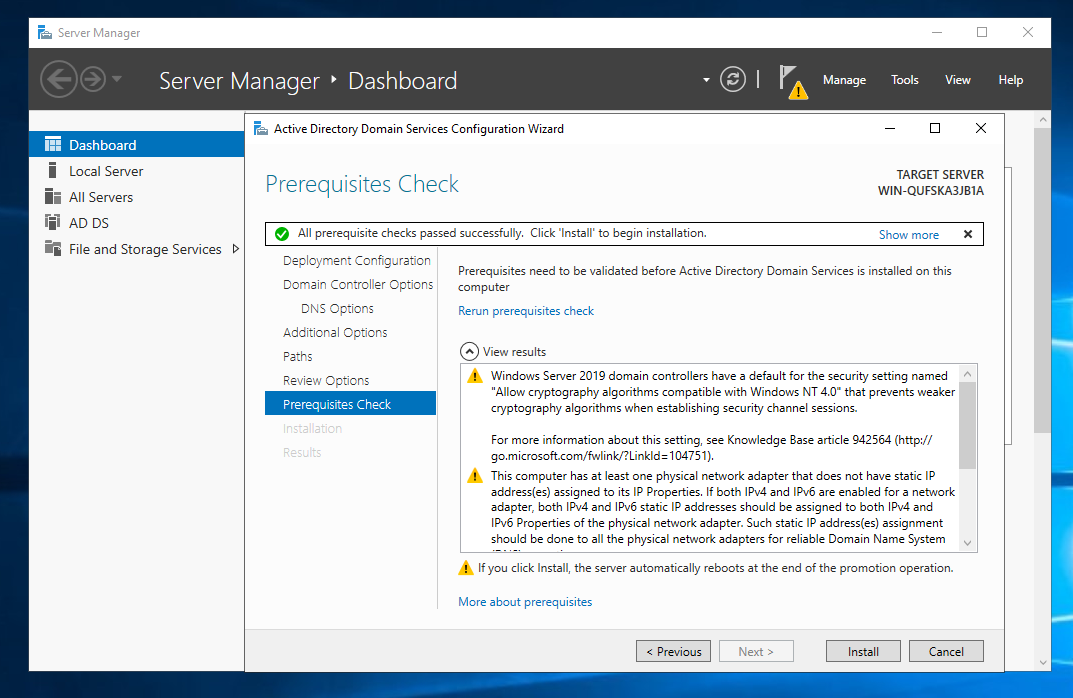
Here you can notice that we don’t have a static IP address, which is a must for the server. So up next we’ll proceed to fix that.
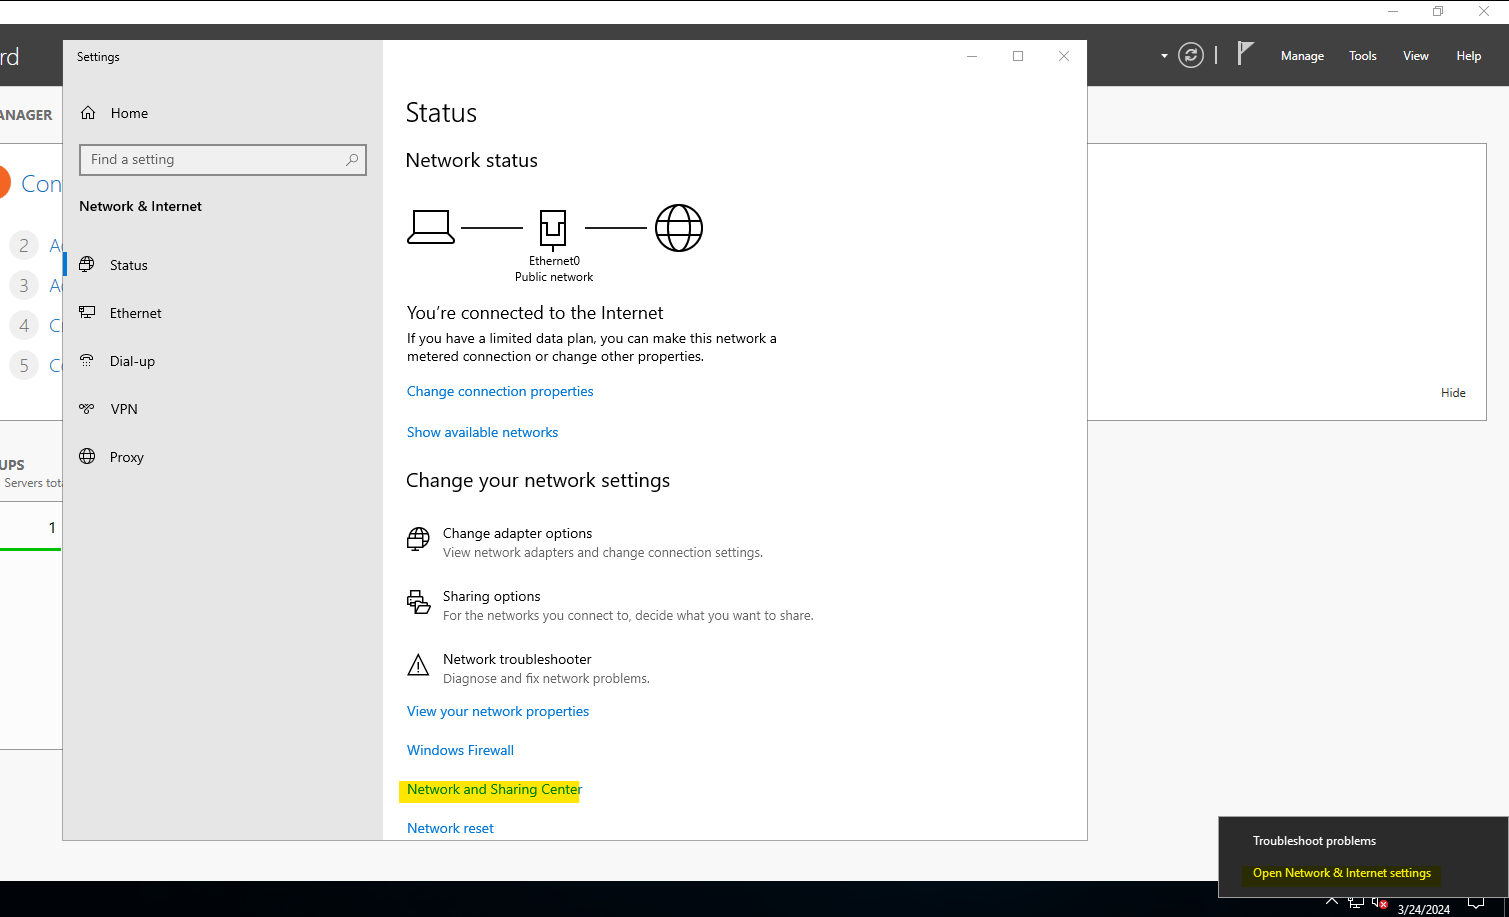
Right click the network tab on the bottom right and select the “Network and internet settings”. After that we’ll head over to Network and sharing center.
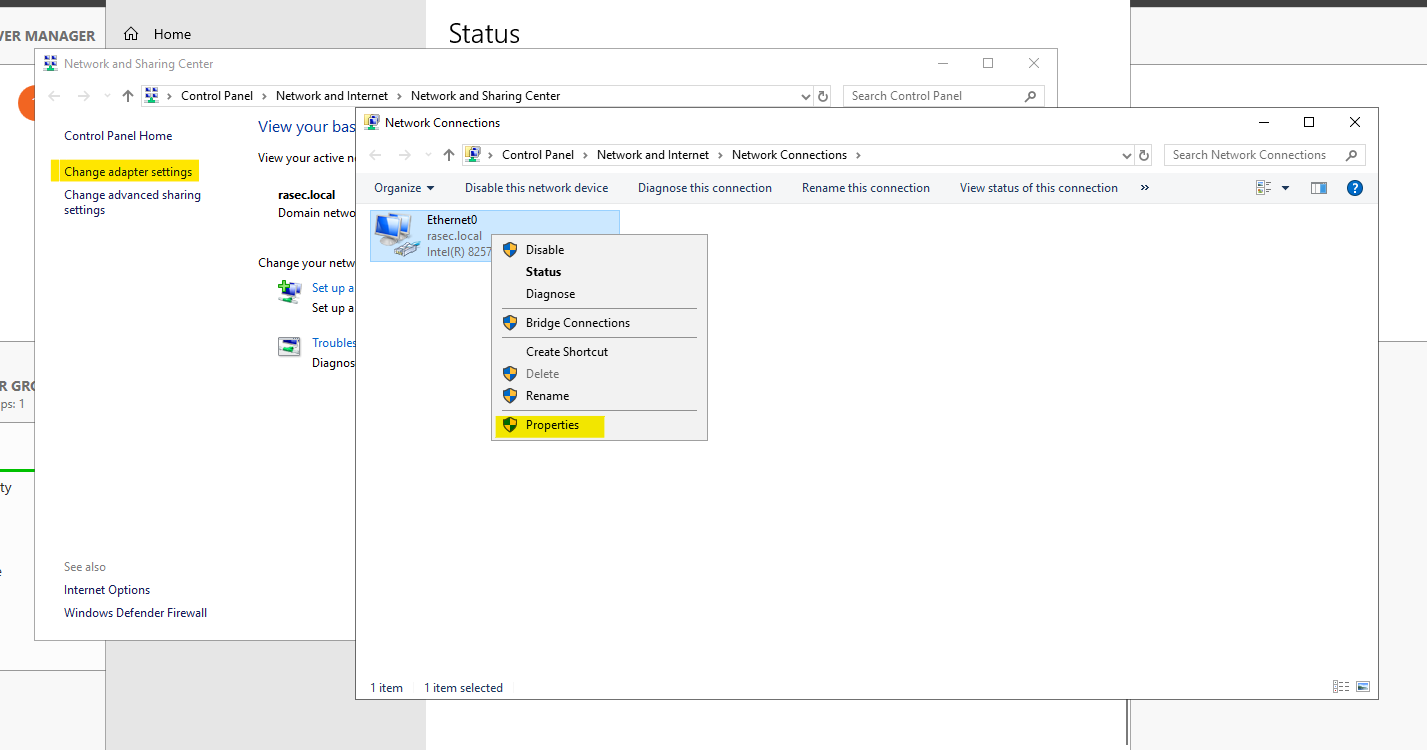
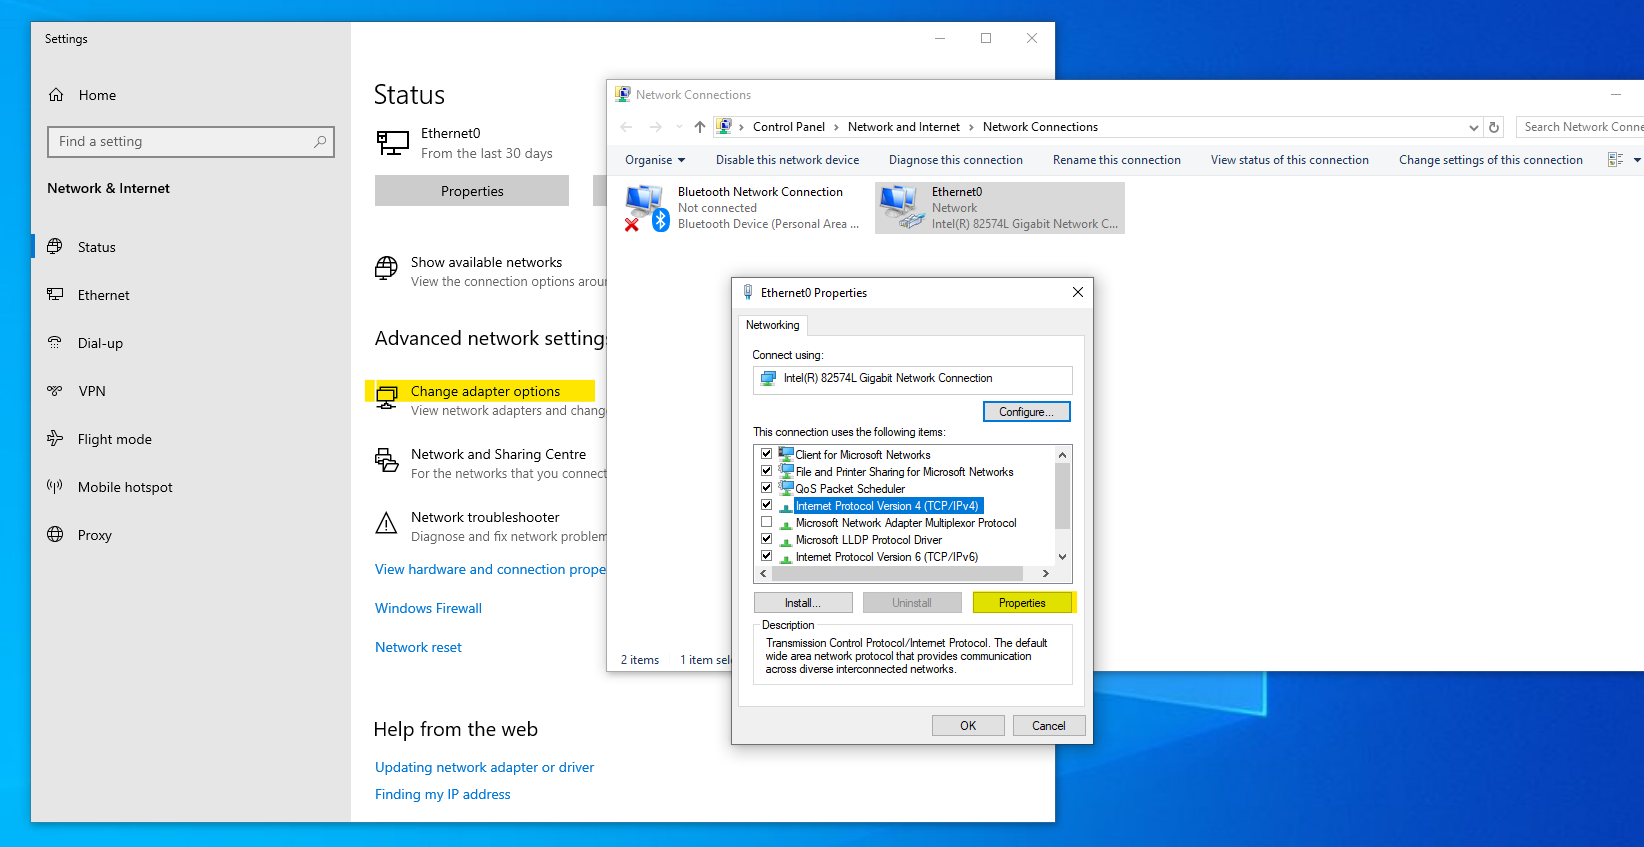
In the network and sharing settings, head over to the “Change adapter settings” and then to the properties of the network adapter. Followed by IPv4 properties as shown.
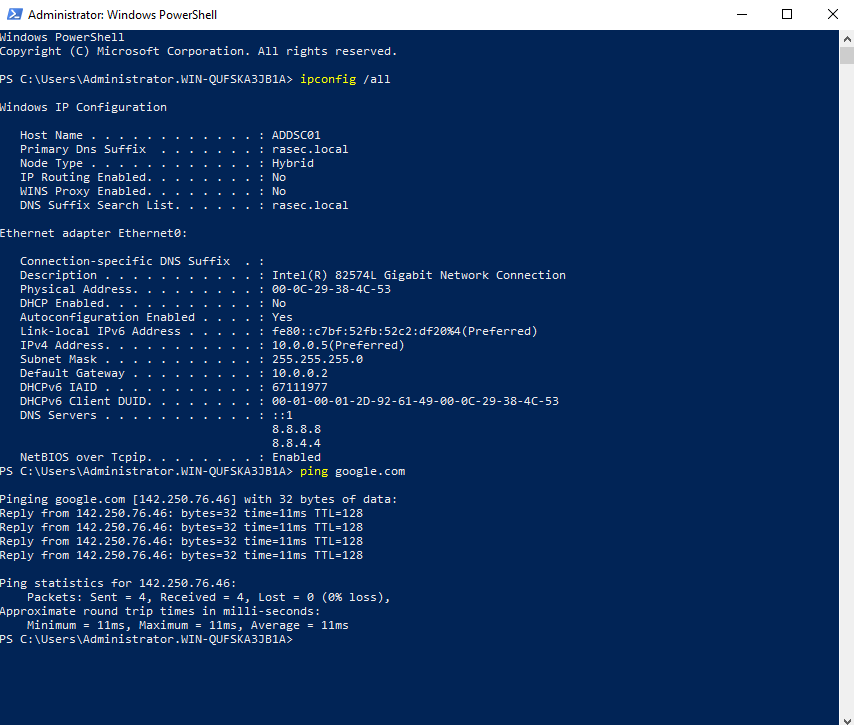
As per the diagram shown in the overview section, I’ve set the static IP address and the default gateway. If you’re unaware of your default gateway, make sure to confirm it on powershell using “ipconfig /all” command as shown below.
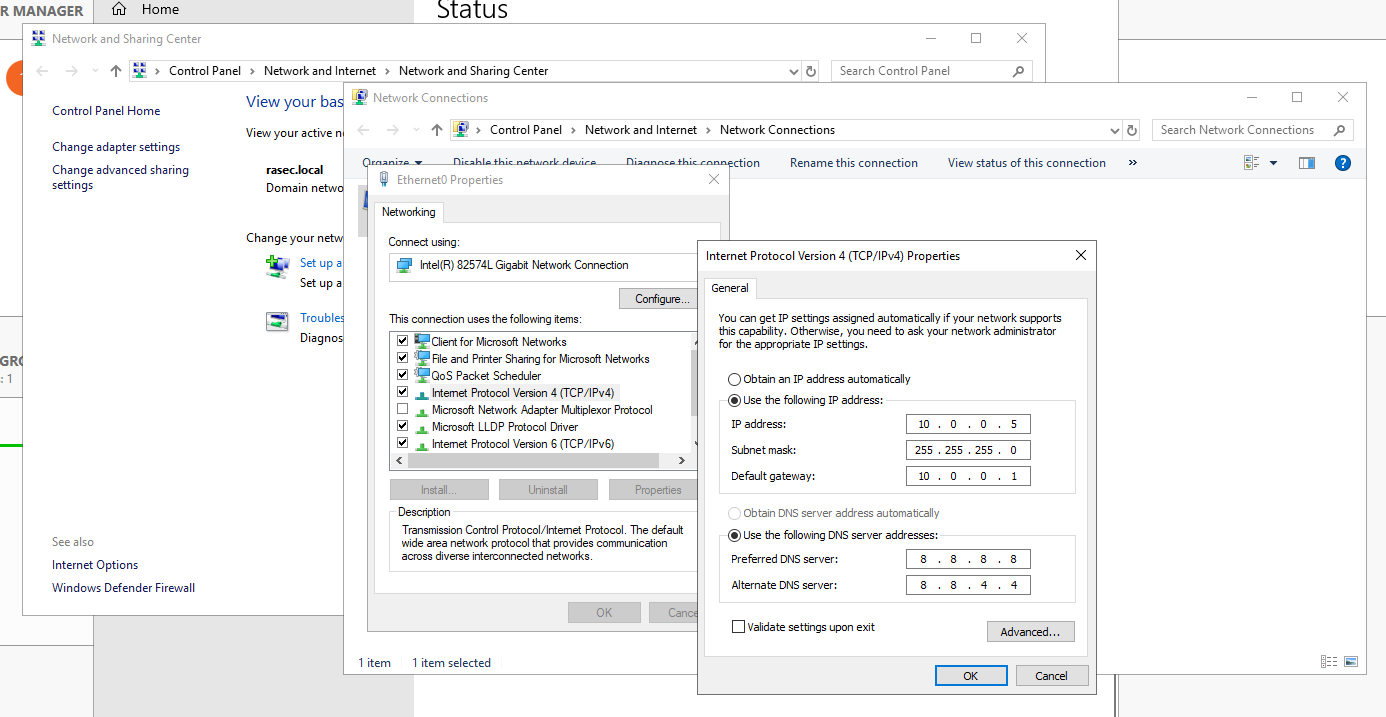
Once that is done, we can check connectivity and our updated settings in powershell (Check your default gateway/network settings here before implementing). A simple ping command tells us that it is working.
Before we move on to the Windows 10 machine. Let’s create a couple of Organisational units and users so that we can login to the Active Directory as normal users.
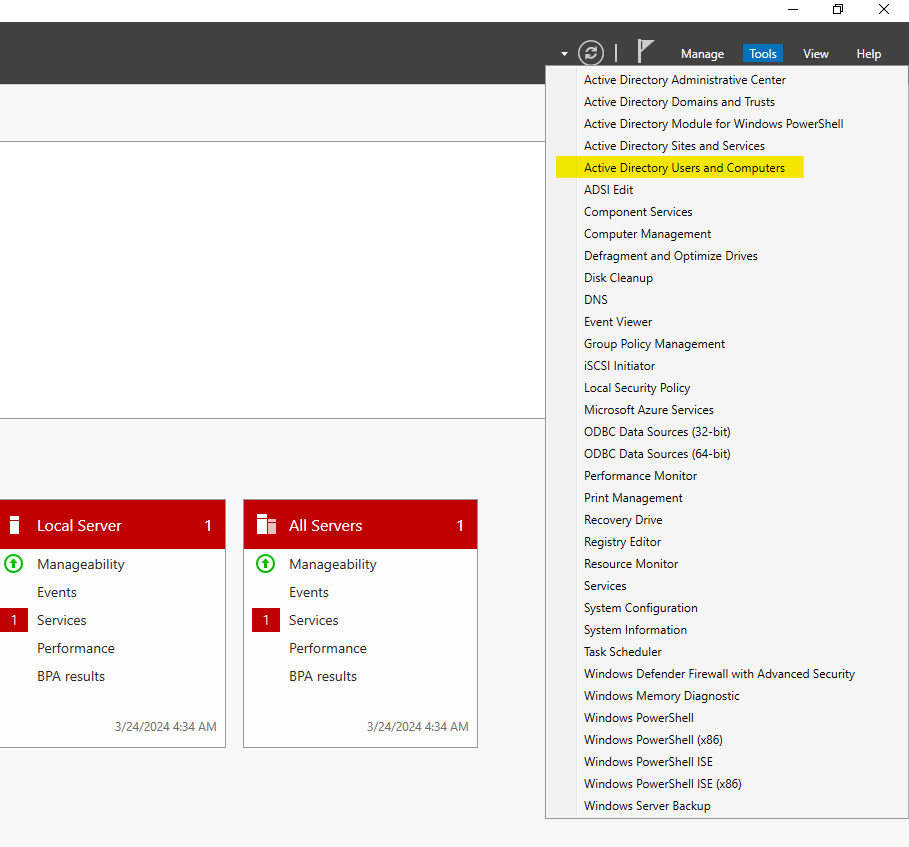
For that we’ll go back to the server manager and to the AD users and computers section.
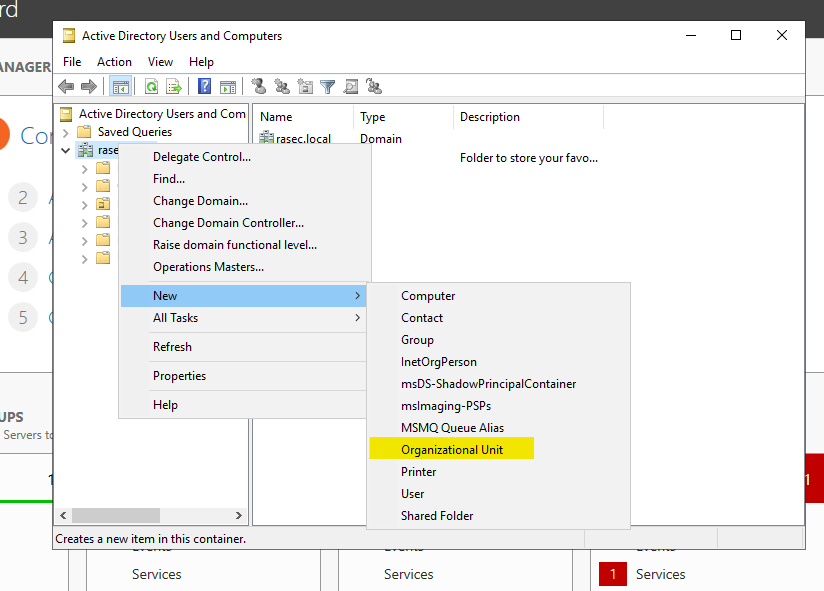
Here, we’ll right click that domain that we’ve created and create a new Organisational Unit.
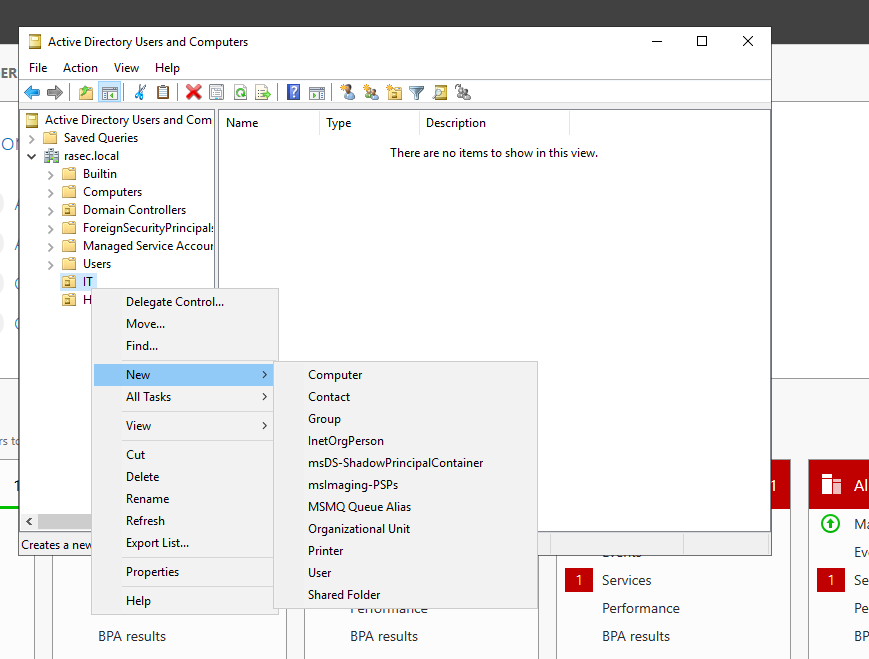
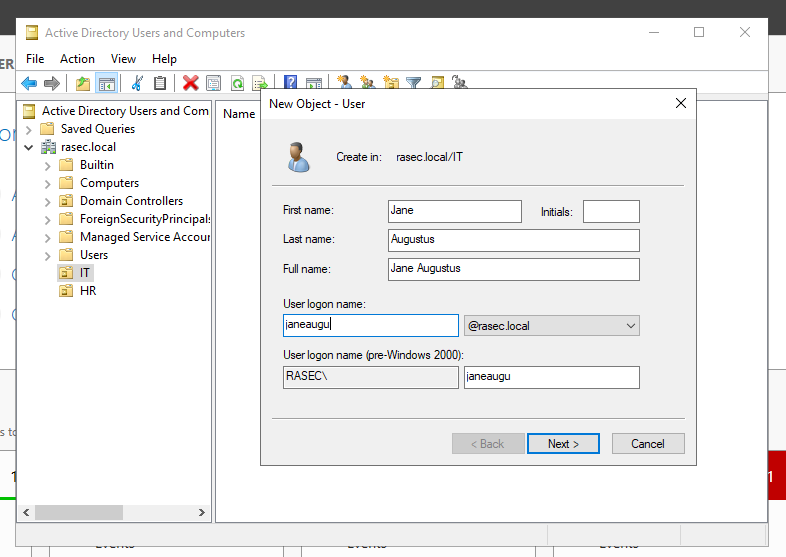
I’ve created two units, one IT and the other as HR. Right click on each new unit, go to the new section and user afterwards to create a new user.
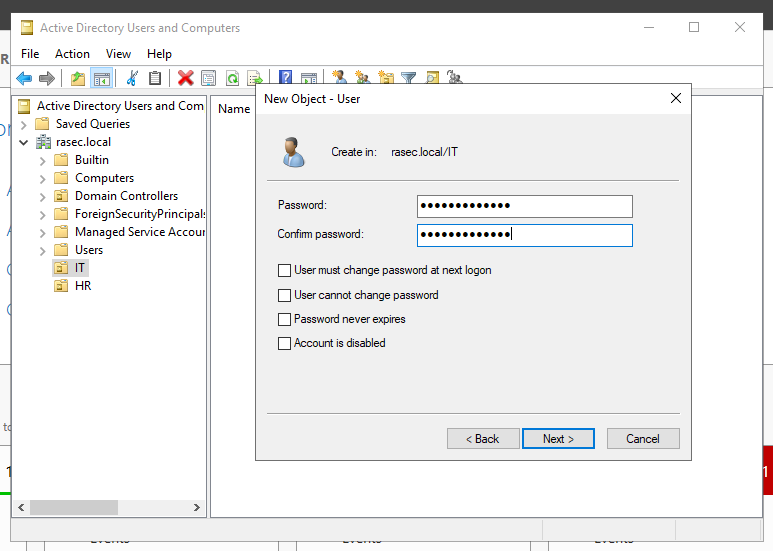
Here, enter all the desired information and on the next page create a password as shown below.
Next we’ll right click the user in IT unit and go to the properties tab. Go to the “Member of” section and add it to the Administrators groups.
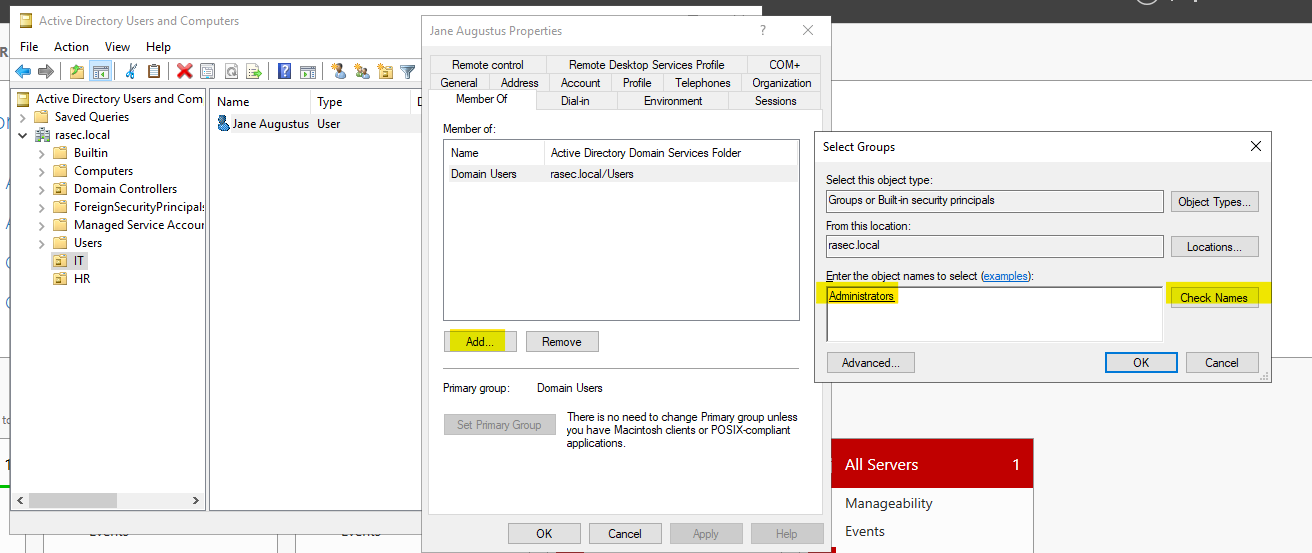
With this, we’ve got a couple of users to login with.
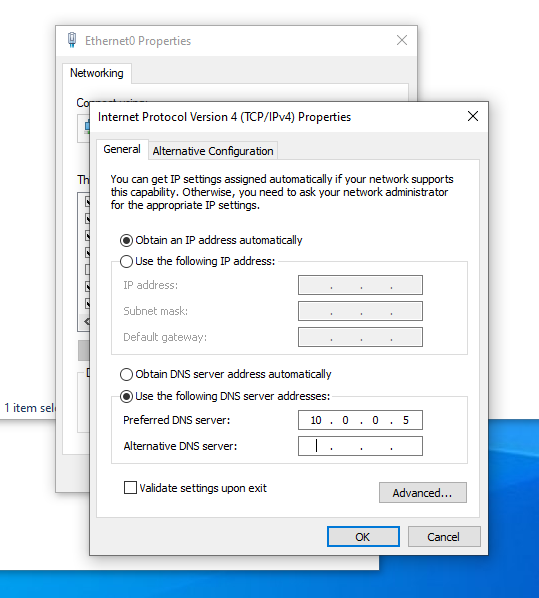
Now let’s head over to our Windows 10 machine. Before we onboard it to our domain, we first have to change the DNS address to the one of our Active Directory Domain Controller because we’re working with a local domain only, we can’t query it to the web. Just like we set up the static IP on the server, we’ll follow the same steps. Network & Sharing center > Change Adapter settings > Adapter Properties > IPv4 configuration.
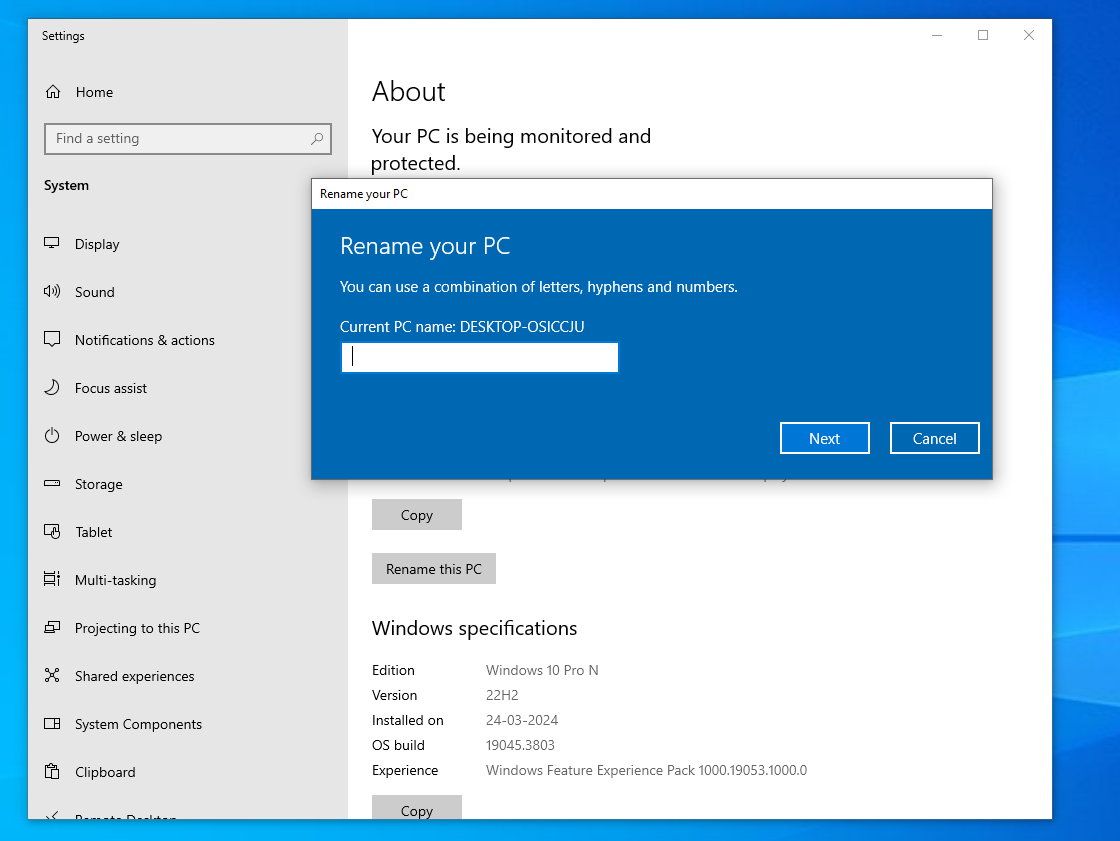
Next up, just like we renamed our server, we’ll rename the Windows 10 machine as well. We’ll head over to the properties and click on rename this PC option.
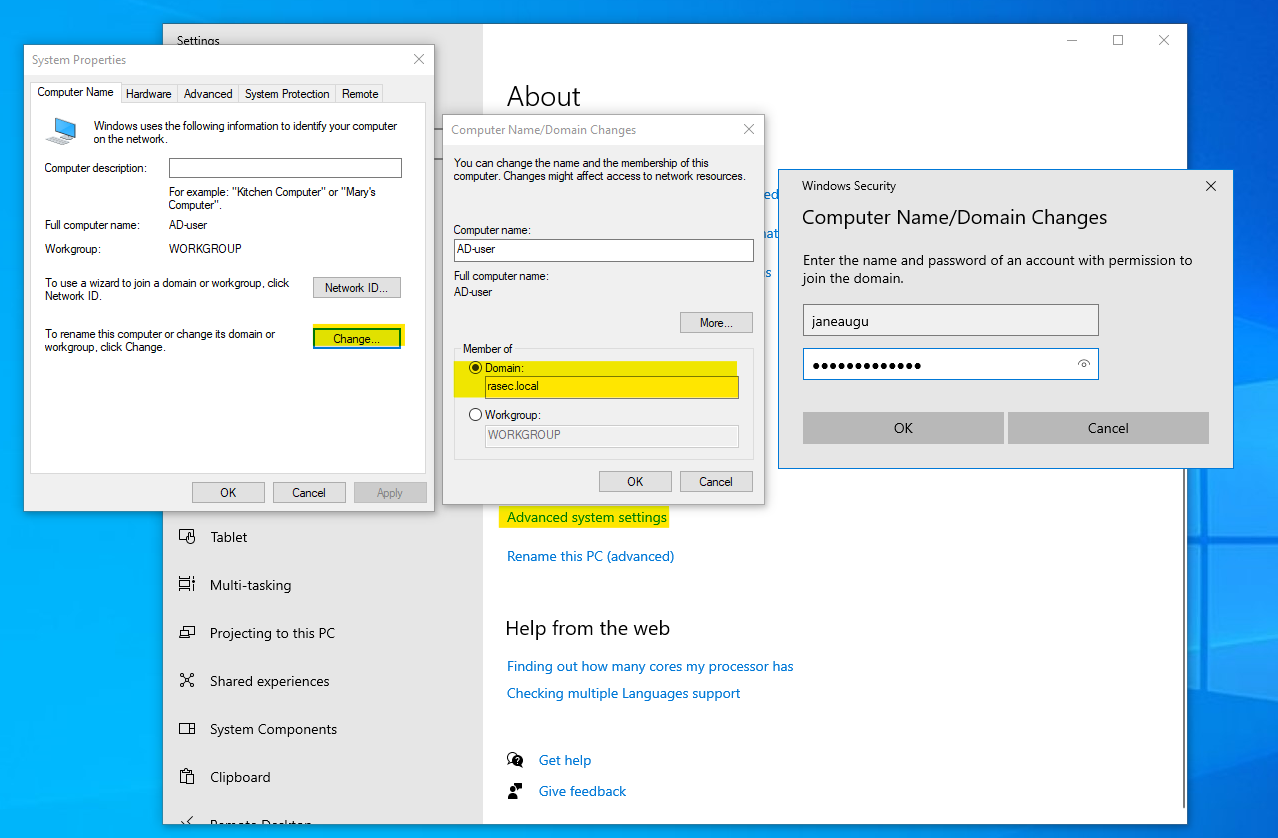
Once renamed, if we scroll down on the same page, we’ll see “Advanced System Settings”. Clicking there we’ll see an option to change the domain on the computer. Here we’ll add our created domain and it will prompt us for user and password. I’ll use one of newly created users for that.
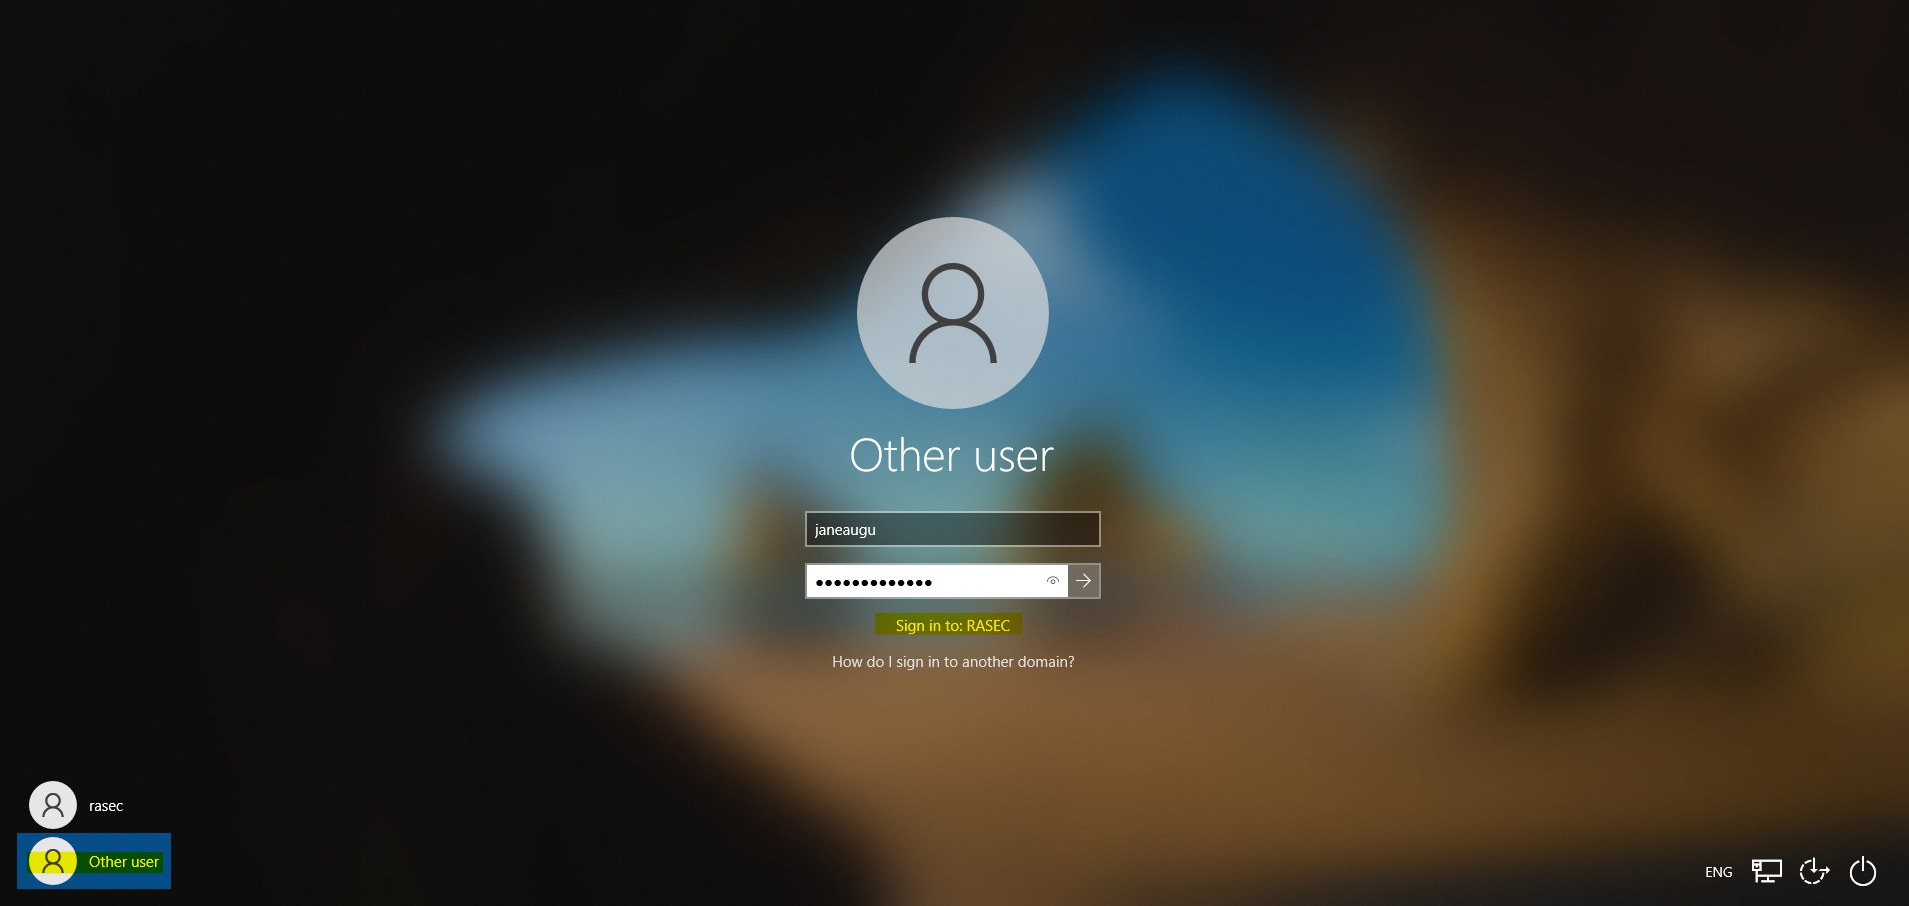
It will prompt us to login again. When the windows login screen will appear, make sure to select “Other User” in the bottom left and make sure that it says that we’re logging in to a damain as highlighted below.
Now you should be greeted with the Windows 10 home screen. With the Windows 10 configuration completed next step is to install Sysmon on both, server and the user machine.
I will only cover the installation of sysmon on the server because the steps are inherently same on both server and the windows 10 machine.
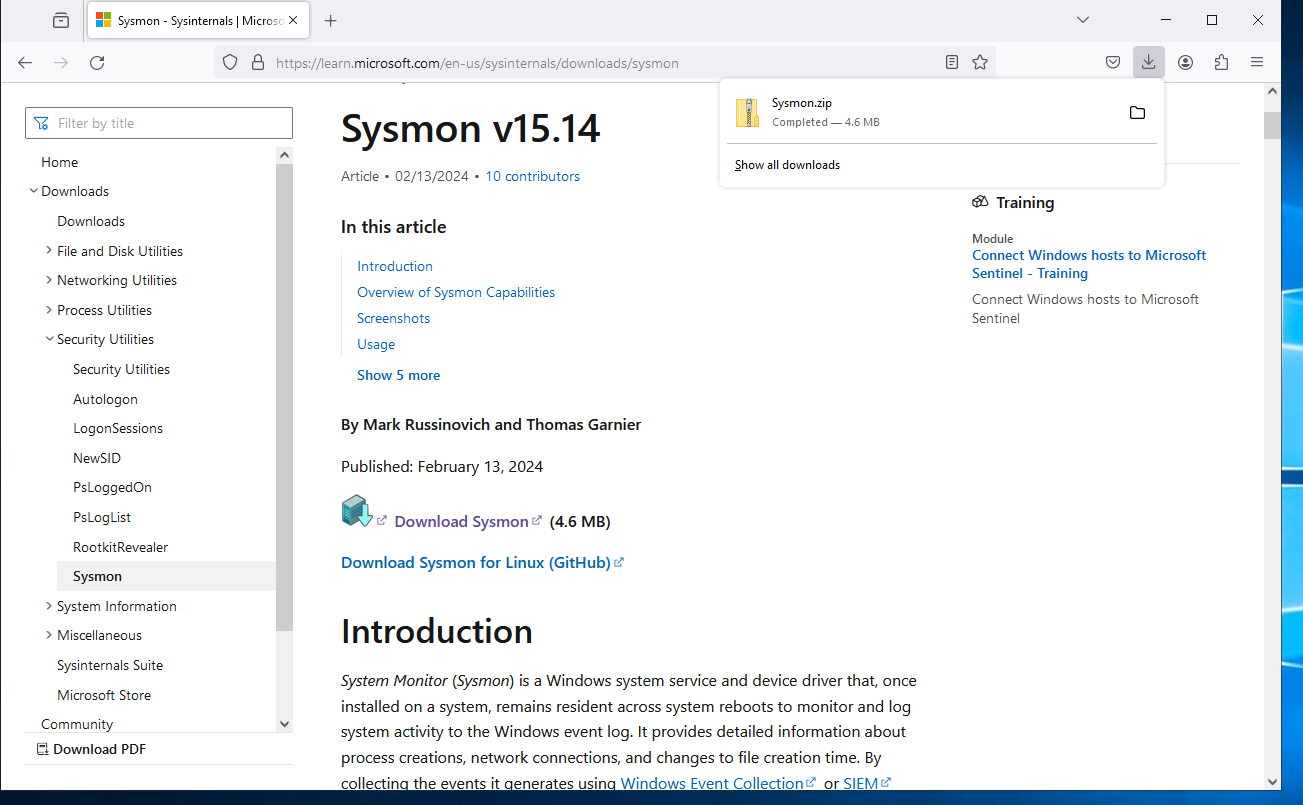
In the windows server, we’ll head on to the Sysmon’s website here and download the latest version available.
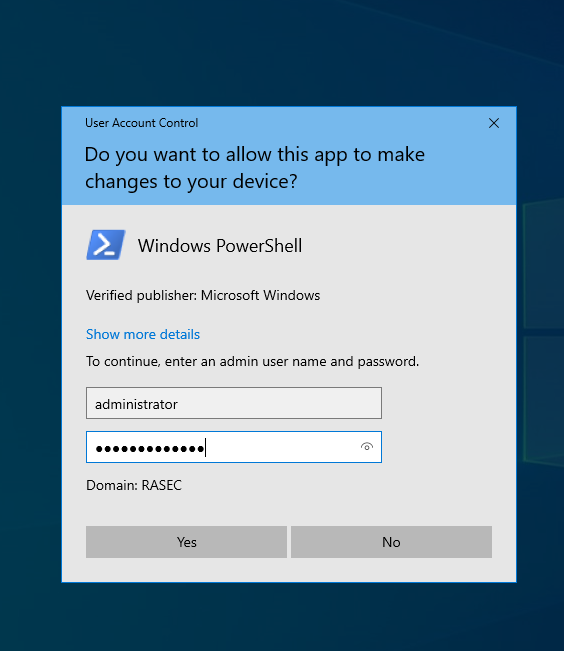
Now we’ll open an administrator powershell.
Note - On the server it might not ask you for authentication, but when doing the same on windows 10 machine it will ask for admin user and pass. Make sure to supply administrator credentials as shown below.
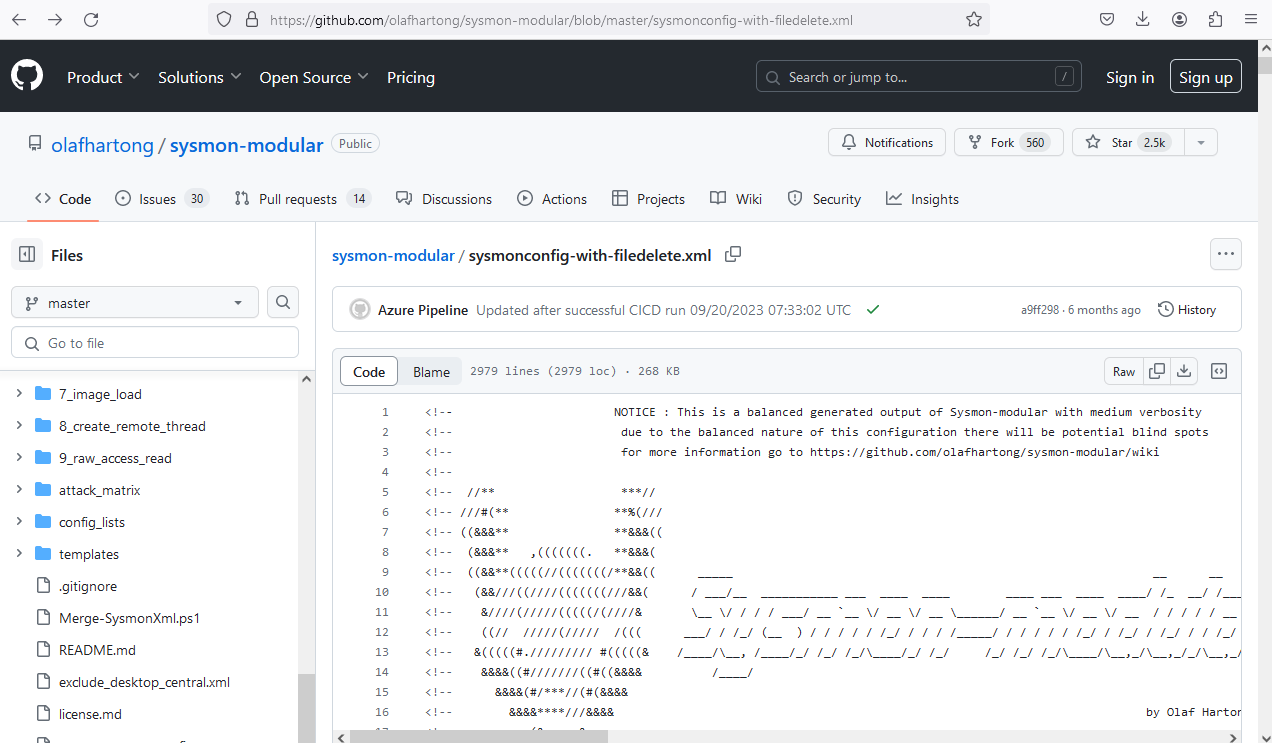
Before we go ahead with the setup of Sysmon, we’ll require a basic configuration for the same as well. We can get configuration from this. I’ll be using sysmonconfig-with-filedetele.xml.
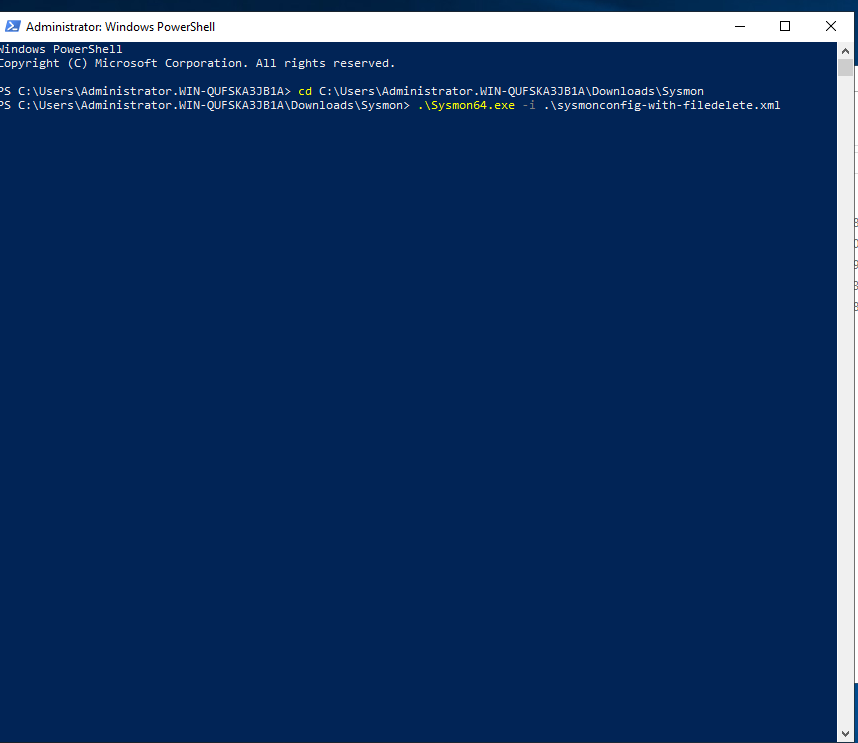
In the administrator powershell, I’ll head over to the folder where I extracted sysmon using the “cd” command and then I’ll run the following command.
1
.\Sysmon64.exe -i .\sysmonconfig-with-filedelete.xml
Here “-i” installs the service using our provided config file.
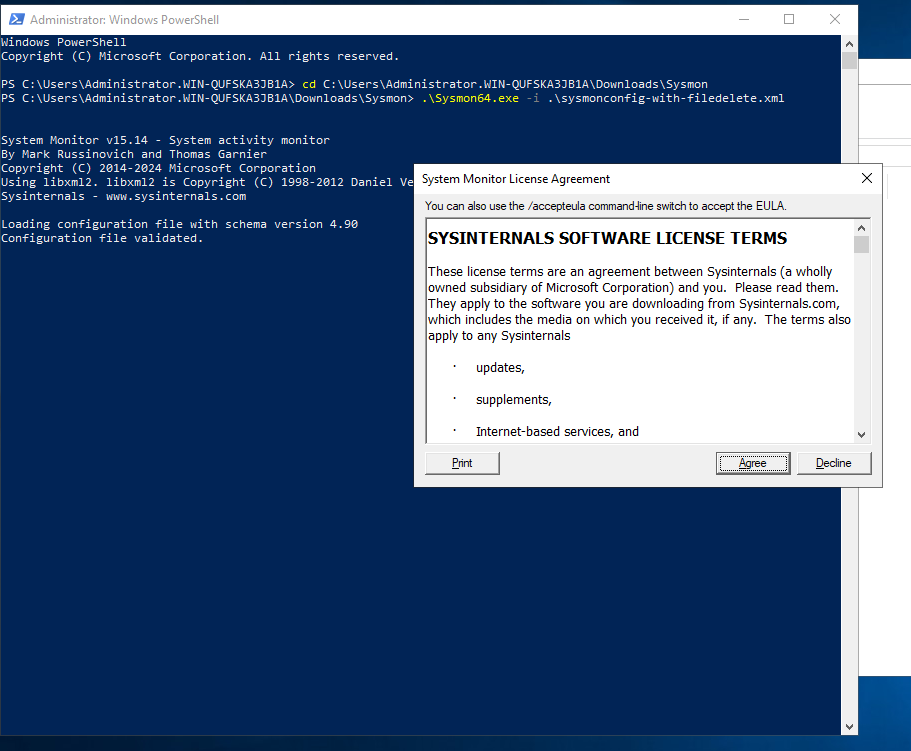
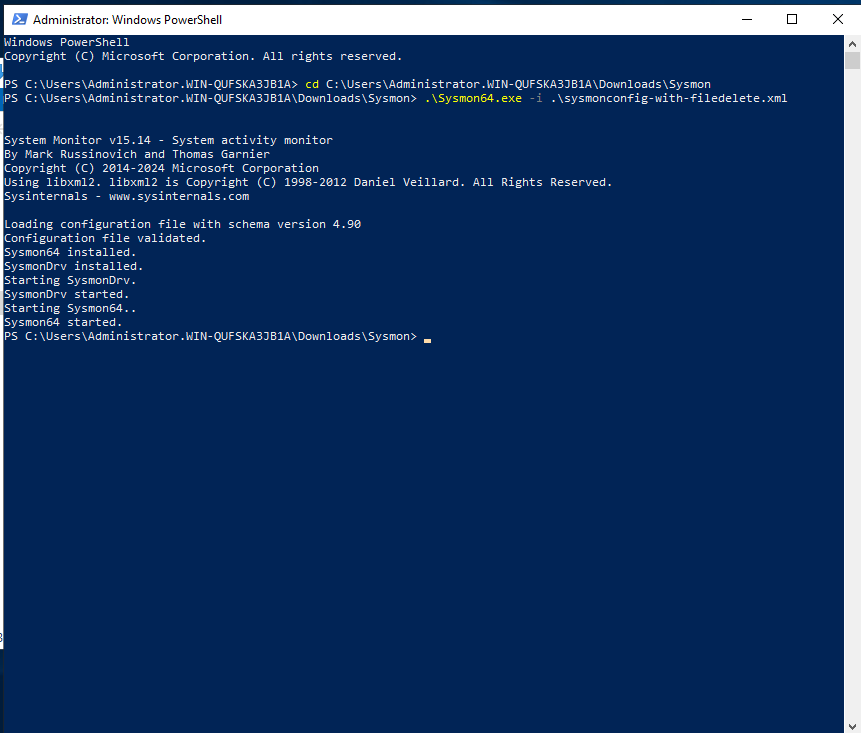
We’ll be greeted by EULA, which after accepting we can see that Sysmon will be installed and running.
With this our Active Directory segment is pretty much ready. The only part left right now is to install our splunk server and install splunk universal forwarder on our server and to the Windows 10 machine. Both the things will be covered in the part two.
For any troubleshooting help feel free to reach out to me on my socials.